Warhammer Quest: Darkwater - Mire Kelpies & Tokens
As they’re quite small miniatures, I figured that I would be able to get the Mire Kelpies enemies, and the Treasure Tokens and Living Rot tokens all done in short order. Plus they looked like they would be fun miniatures to paint.
Mire Kelpies
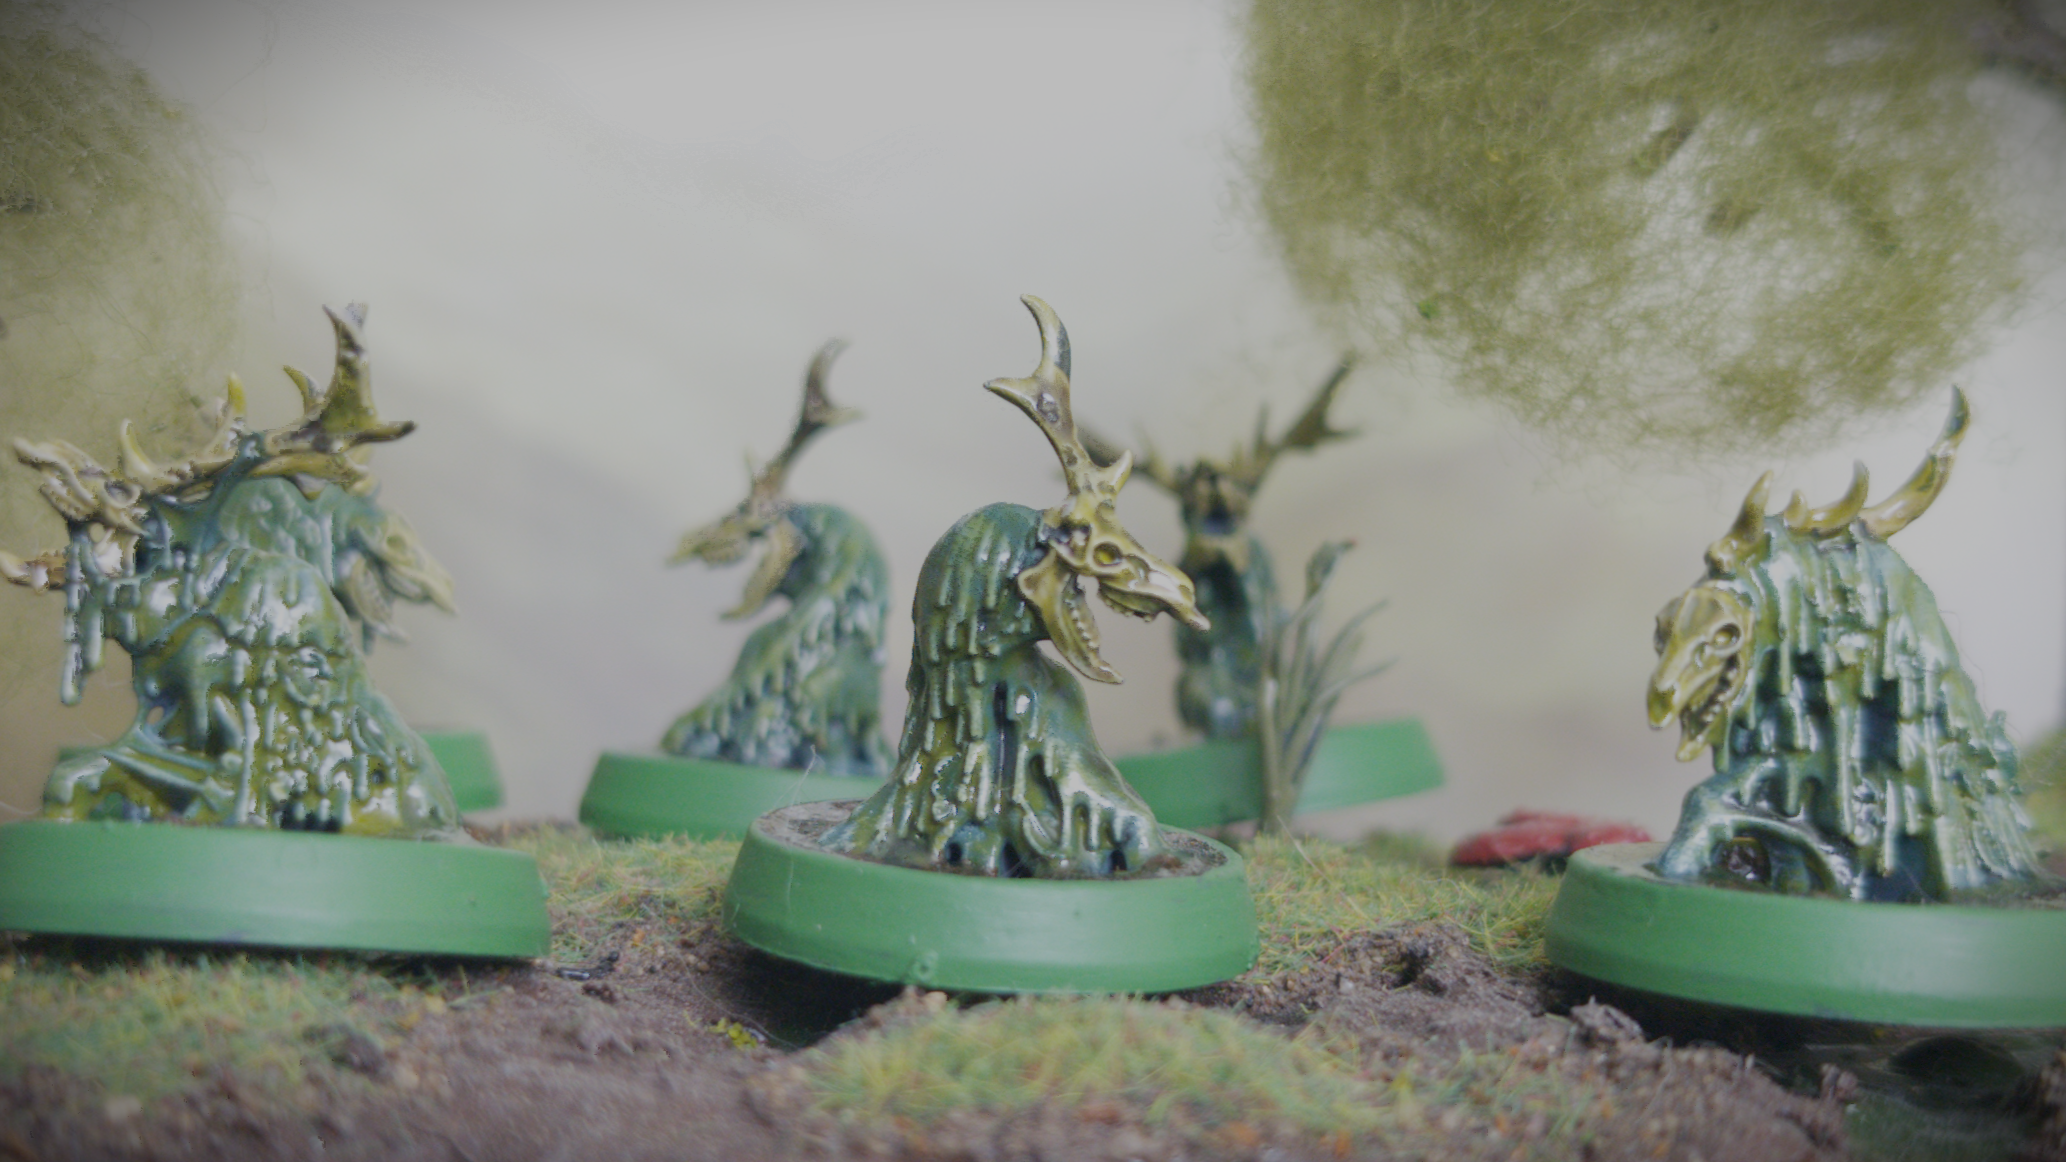
Backdrop by Jon Hodgson Backdrops
First things first for the Kelpies I knew right away that I wasn’t going to use the bases they came with. I had some recessed bases, of appropriate size, left over from the Rotmire Creed and they seemed ideal for what I wanted to do. So I clipped off the tabs on the underside of the Kelpies and glued them into the recesses of the bases before priming them with Colour Forge Standard Grey.
As the Mire Kelpies are effectively formed of swamp detritus I figured that the Cool Desaturated Greens triad I had picked up from the Army Painter would be a good place to start for the colour scheme. With that in mind I basecoated the miniatures with Army Painter Evergreen Fog before giving them a relatively hard drybrush of Army Painter Patagon Pine. With that done I picked out the skulls and antlers with Army Painter Skeleton Bone and the leaves dotted about the models with Vulkan Green. I have seen some people use an autumnal orange-red for the leaves and it does look good but I didn’t want mine to stand out too much so I kept things in the green side of the colour wheel.
From there I jumped ahead a little and covered the flat areas and walls of the base with Vallejo Thick Brown mud. Doing at this stage will help to blend things together in the long run. For the washes I first gave the bone details a coat of Army Painter Strong Tone and then washed the whole model, including the base, with Army Painter Military Shade. For the highlights I drybrushed the bone details with Tyrant Skull and the remainder of the model and base with Army Painter Mossy Green.
At last we come onto the reason that I chose to use the recessed bases; to fill them with UV resin. I squirted the resin and used a toothpick to manoeuvre it around the model, trying not to agitate it too much so that it formed bubbles. I then gave it a good blast with a UV torch until it was rock hard. UV resin also gets a little warm so I left them to cool down before doing anything else.
The UV resin I have is completely clear, and obviously swamp water is anything but. To tint things towards the greener side I dabbed one a thin layer of AK Interactive Swamp Water gel. It’s important to keep this layer thin as it can get very opaque very quickly and thus ruin any reason for using the UV resin. To make the Mire Kelpies look more slimy I gave them a thin coat of Nurgle’s Rot. Just enough to tint the model slightly and give a glossy finish. Lastly, I painted the rims of the bases with Warboss Green to match the rest of my Nurgle forces.
Treasure Tokens
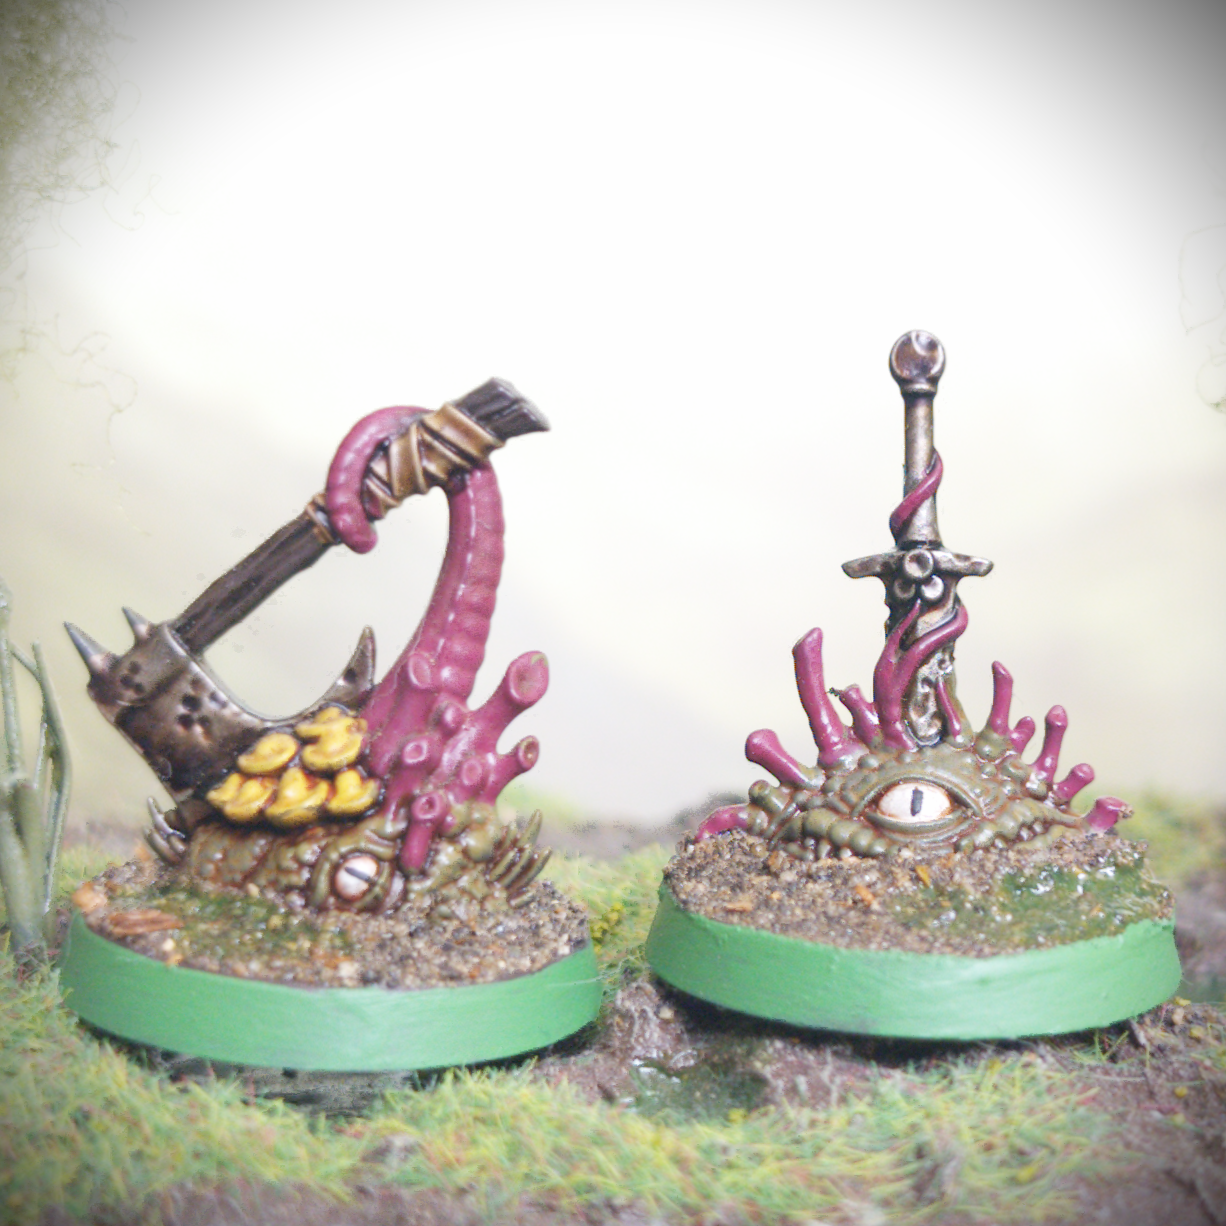
Backdrop by Jon Hodgson Backdrops
Next up were the Treasure Tokens, nondescript piles of flesh. In hindsight I should have put them in recessed bases as well, they would have looked awesome Oh well.
To get things started I primed them with Colour Forge Standard Grey and then gave them a basecoat of AK Interactive Moss Green. I chose Moss Green as it's a desaturated green that would differentiate it from the more vibrant colours of my Nurgle daemons and the slightly bluer tones of the Mire Kelpies above.
From there I picked out the tentacles with Two Thin Coats Sword Hilt Burgundy and the mushrooms with Vallejo Heavy Goldbrown. For the axe, I painted the handle with Two Thin Coats Scorched Earth and the wraps on said handle with Vallejo Khaki. Lastly I painted the eyes with a couple coats of Ulthuan Grey and the blades of the weapons with Scale75 Thrash Metal.
With the basecoats done I moved on slathering on the washes. I started by giving the model an all over wash of Reikland Fleshshade. Side note, I really like how this looked over the silver and I’ll have to keep it in mind for future projects. I further made the metal look old and grimy by giving it a coat of Army Painter Dark Tone fellowed by Strong Tone. I also used Strong Tone on the axe handle and wraps. I finished things off by painting a line of Army Painter Matt Black down the middle of the eyes for pupils.
For the base, I first basecoated it with Two Thin Coats Scorched Earth. I then covered the base with PVA glue and dunked it in a tub of Geek Gaming Scenics Base Ready Forest Floor. I then sealed this in place with some Geek Gaming Scenics Matt Sealant. Lastly, I dabbed on some puddles of AK Interactive Swamp Water gel and painted the rim with a couple thin coats of Warboss Green.
Living Rot Tokens
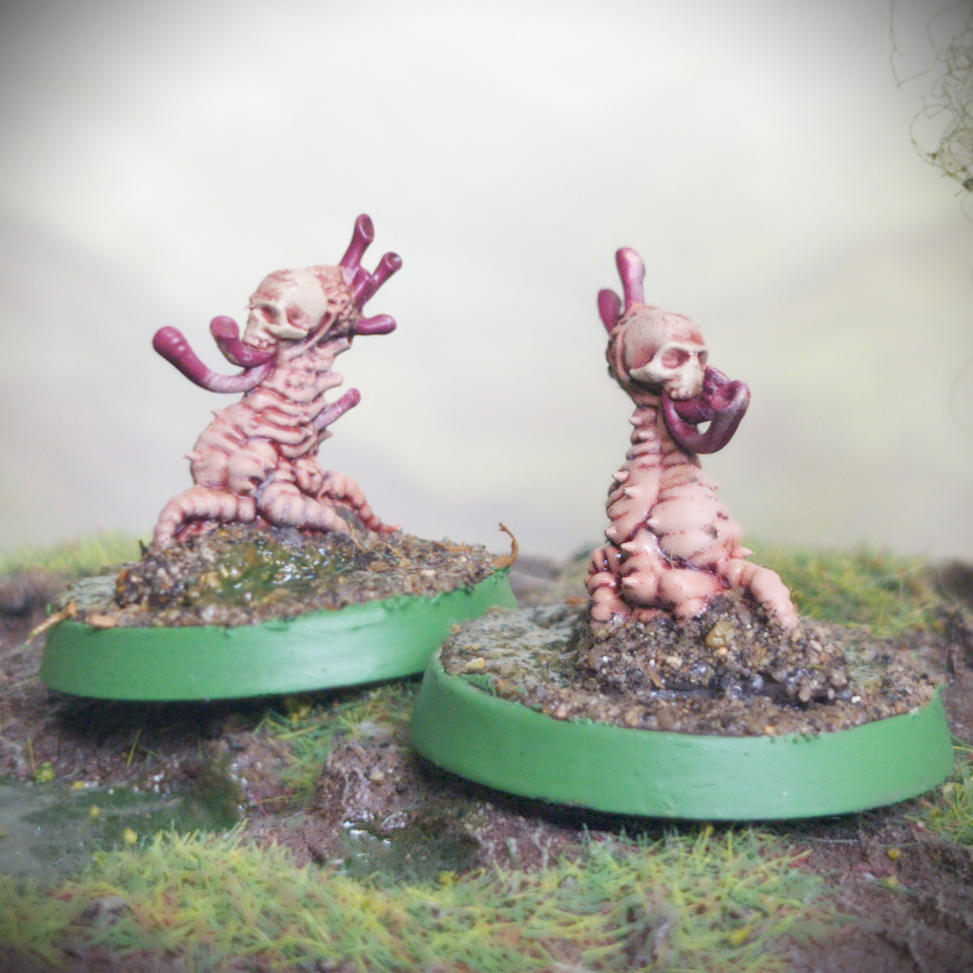
Backdrop by Jon Hodgson Backdrops
Last but by no means least were the Living Rot tokens, these guys have a gross fleshy vibe going on but not in a disgusting way you know? I envisioned them as more blood soaked than rotten. With that in mind I primed these guys with Colour Forge Standard Grey then gave them an all over coat of Air Painter Nomad Flesh.
I picked out the skull with Army Painter Skeleton Bone and the fleshy tubes with Two Thin Coats Sword Hilt Burgundy. To bring out the texture I washed the whole miniature with Army Painter Red Tone and then gave it a drybrush of a mix of Two Thin Coats Dwarven Skin and Pro Acryl Ivory.
For the base, I followed the same process as I did for the Treasure tokens. Base coating with Two Thin Coats Scorched Earth before covering base with Geek Gaming Scenics Base Ready Forest Floor. I sealed this place and then painted the rims of the base with Warboss Green.