Turnip28 - Into The Breach
I have been meaning to get into Turnip28 for a little while, but I’ve never been brave enough to go down the conversion route. In theory you can make Turnip28 models by mashing together Napoleonic and Medieval kits, then covering them in mud. But I always worry that I’d be able to see the underlying kits and not what they’ve become. So, when the Shattered Lance Kickstarter launched, I saw the opportunity to get some official 3D printed models, I couldn’t resist. As the title might suggest, I opted for the Into the Breach set, which is an updated version of the Forlorn Hope set.
Backdrop by Jon Hodgson Backdrops
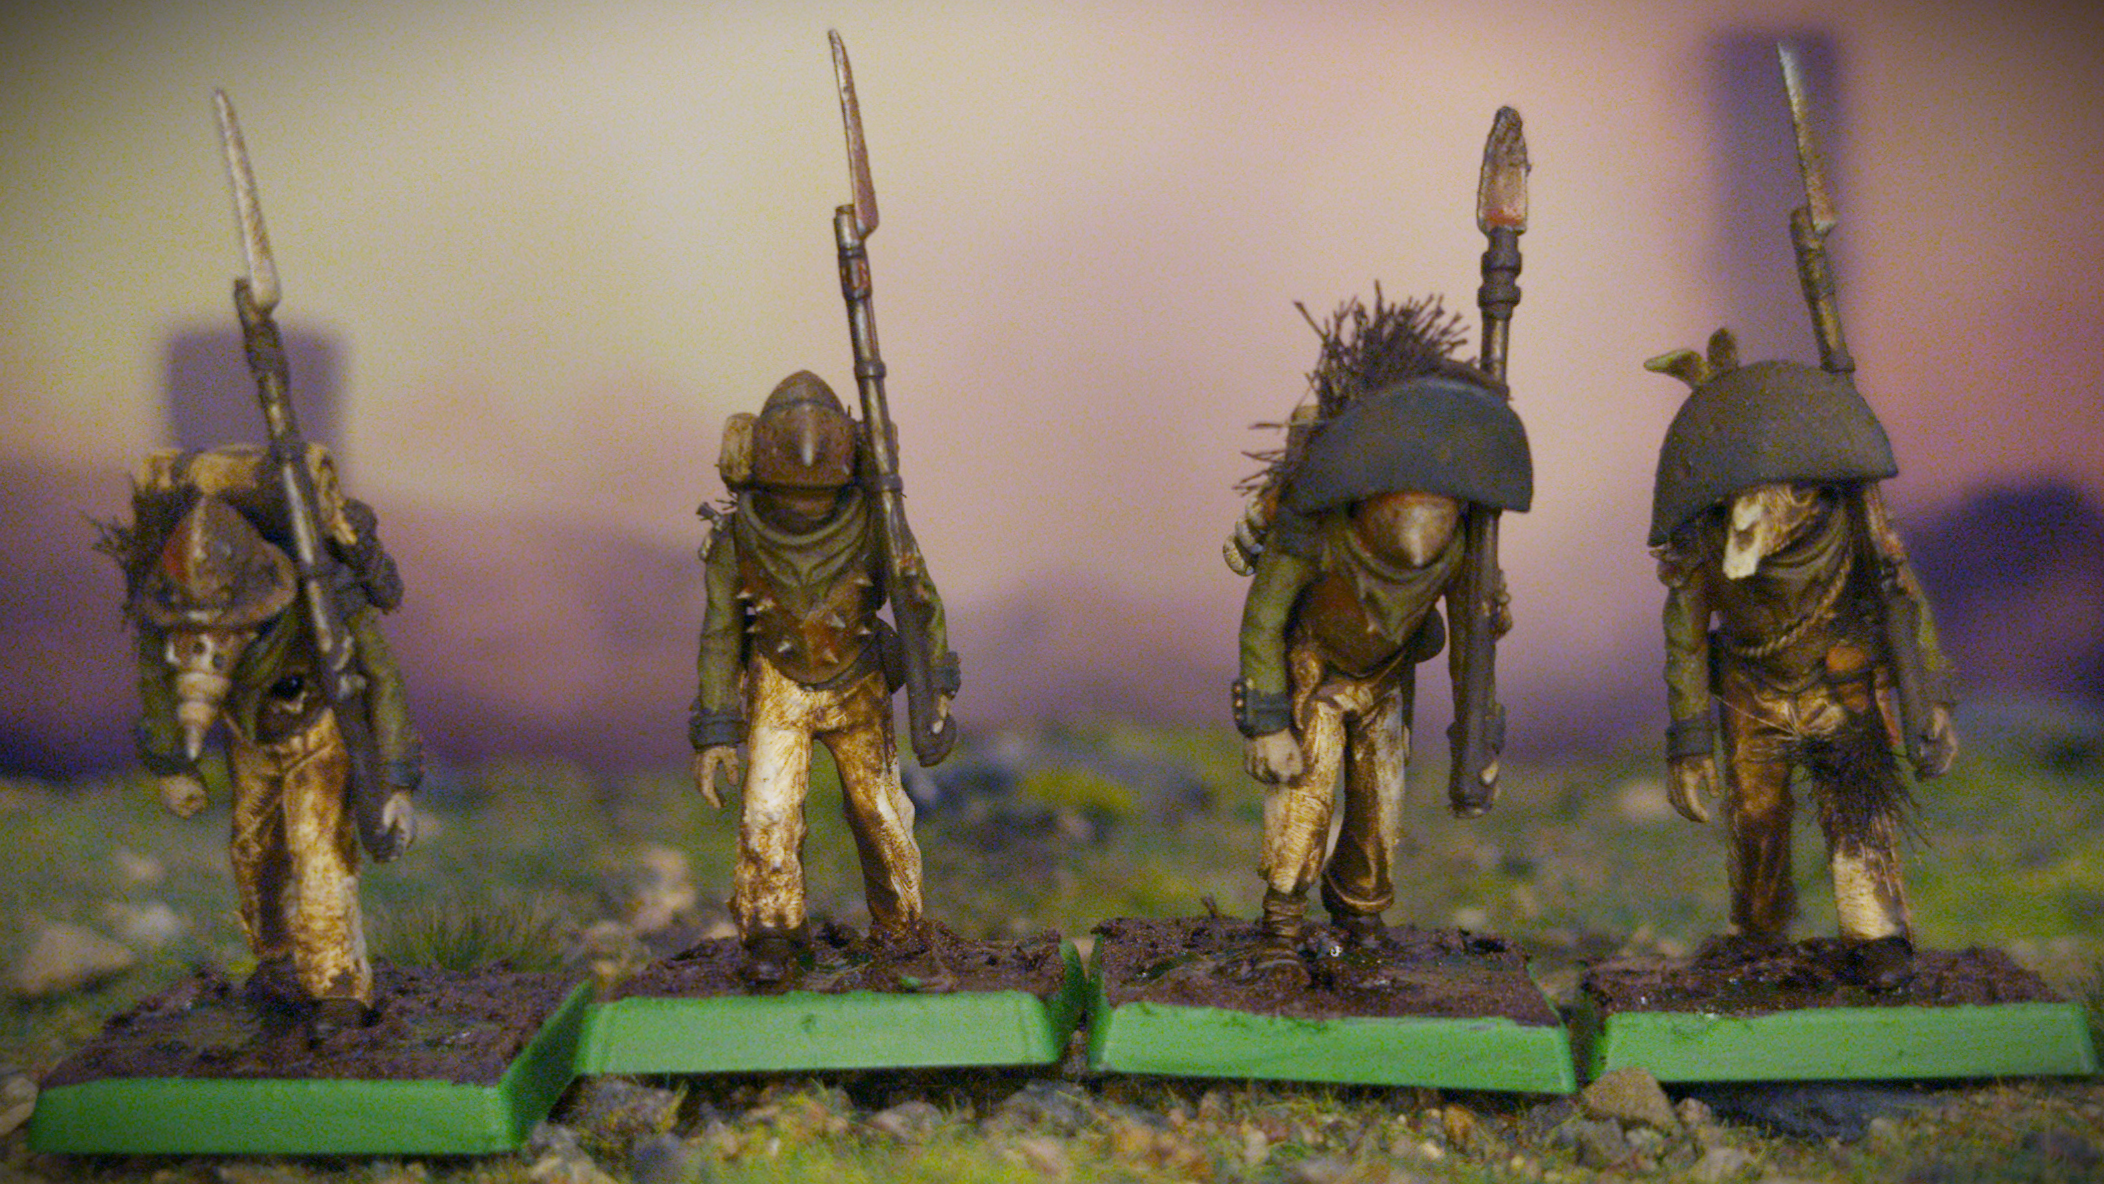
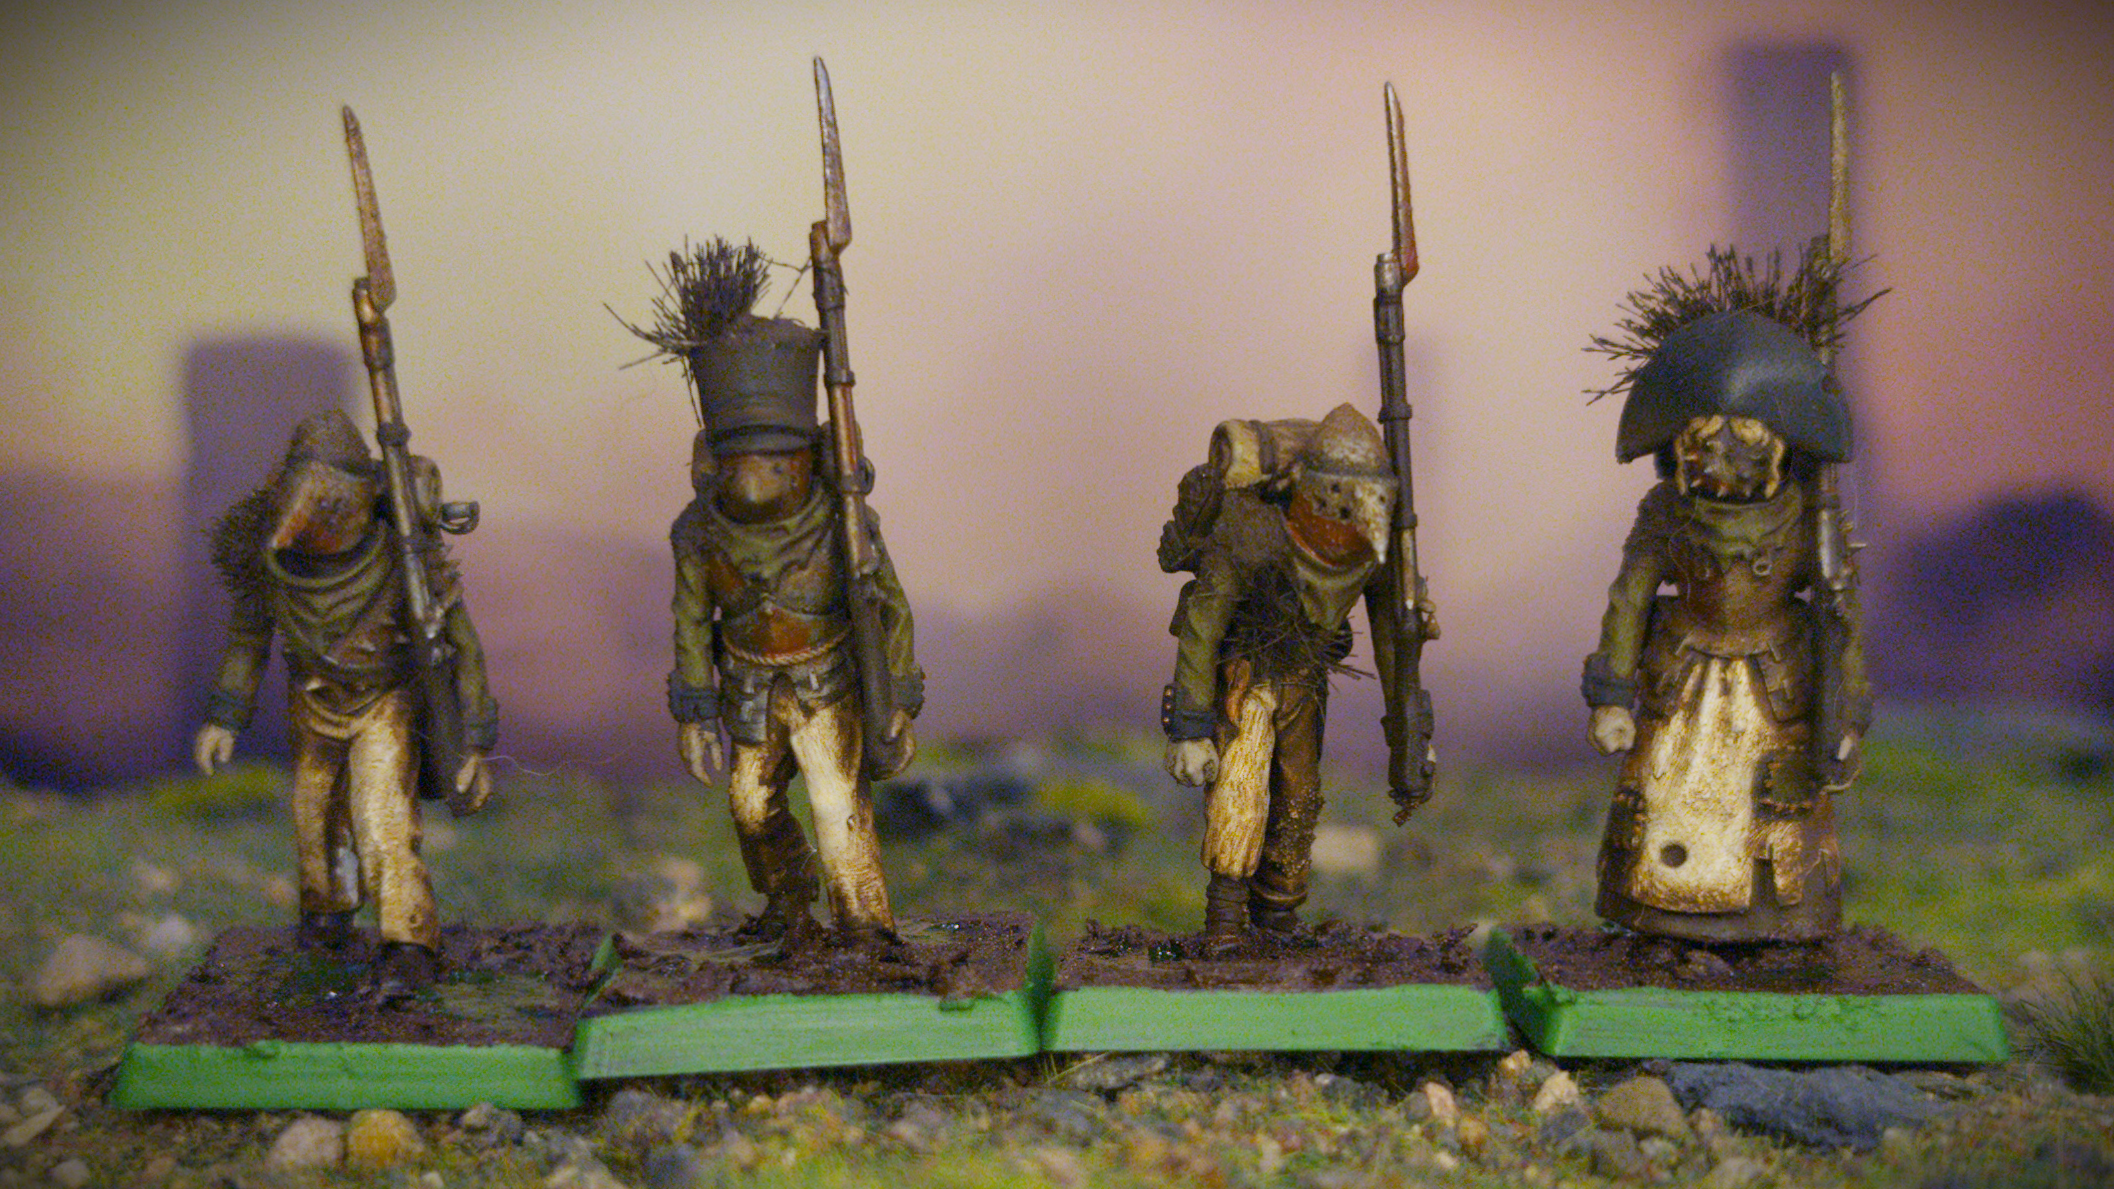
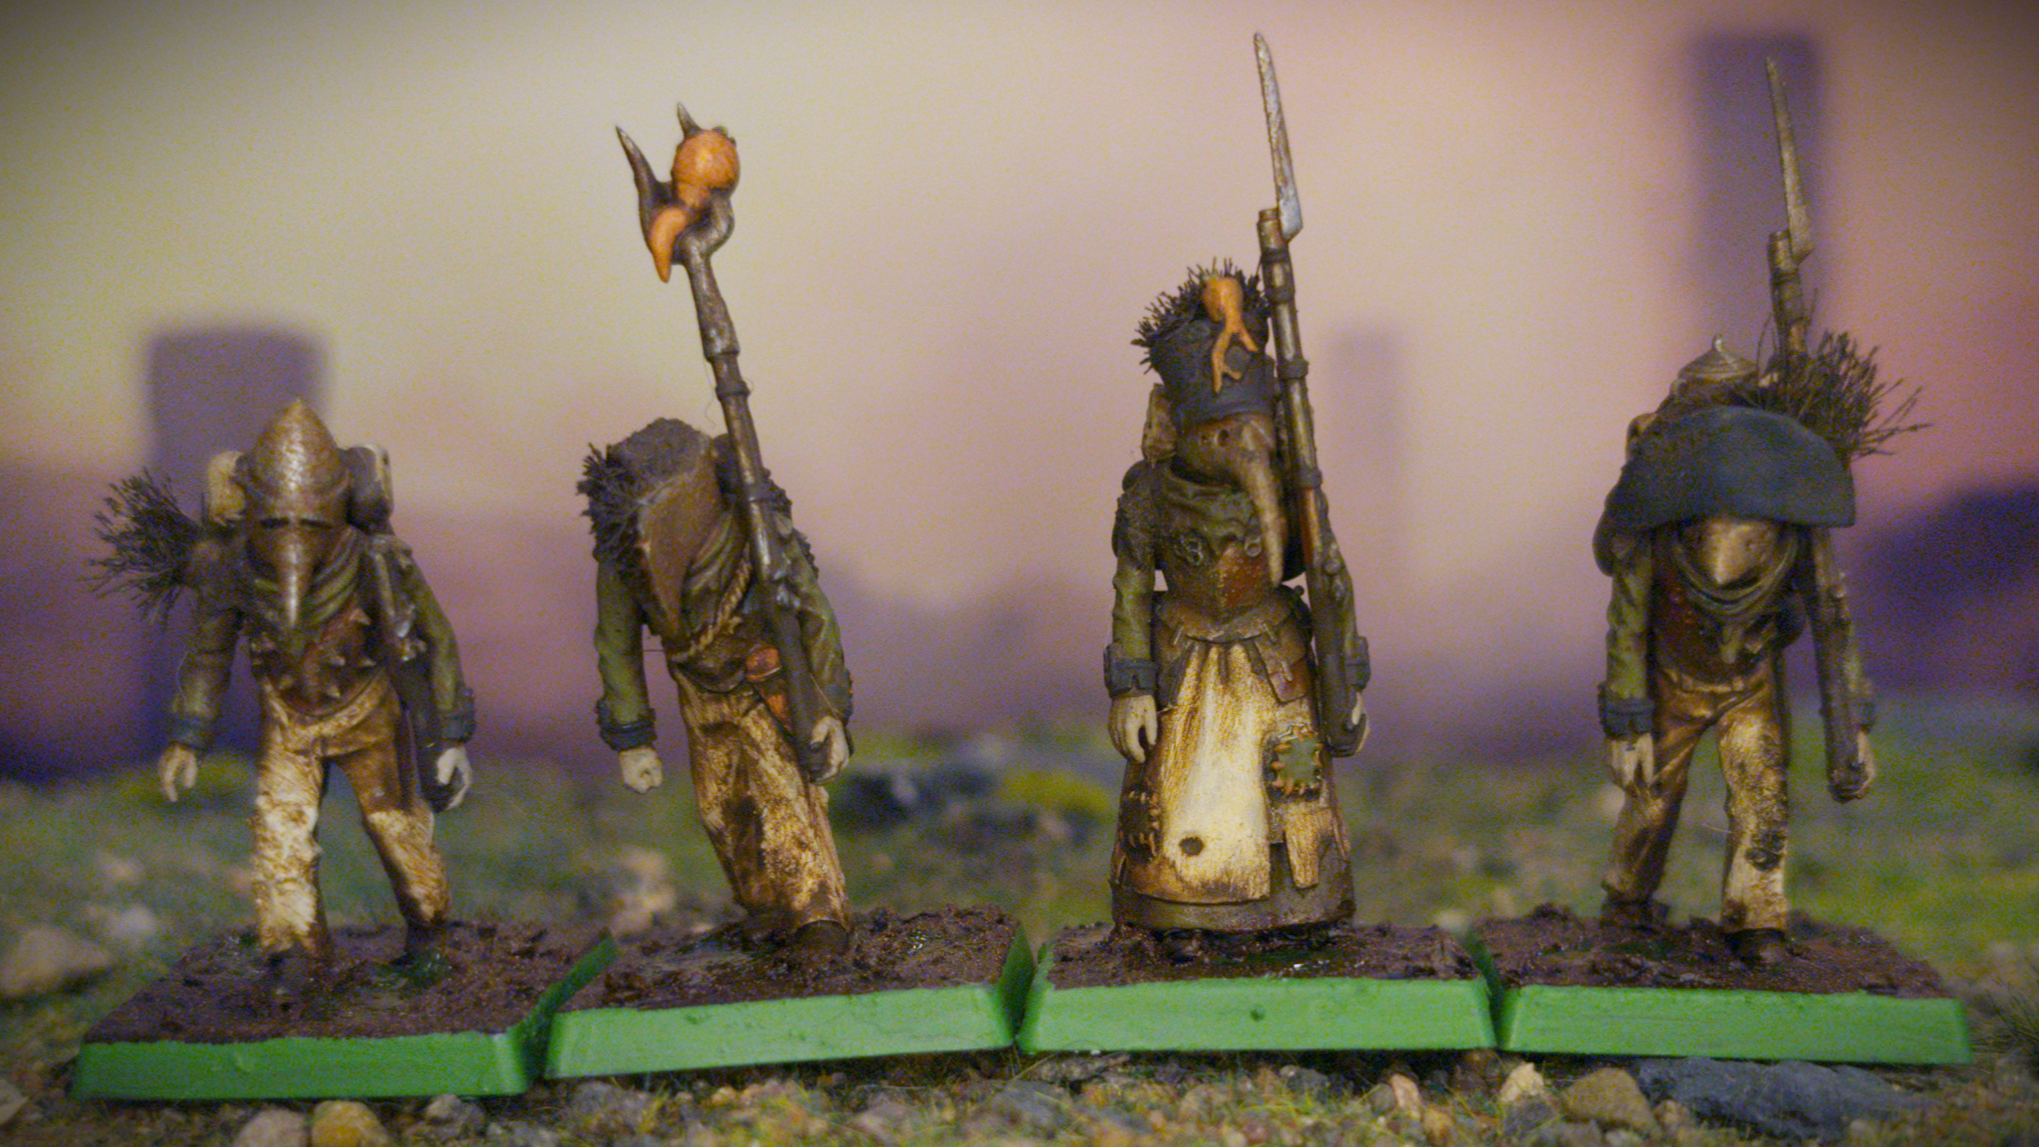
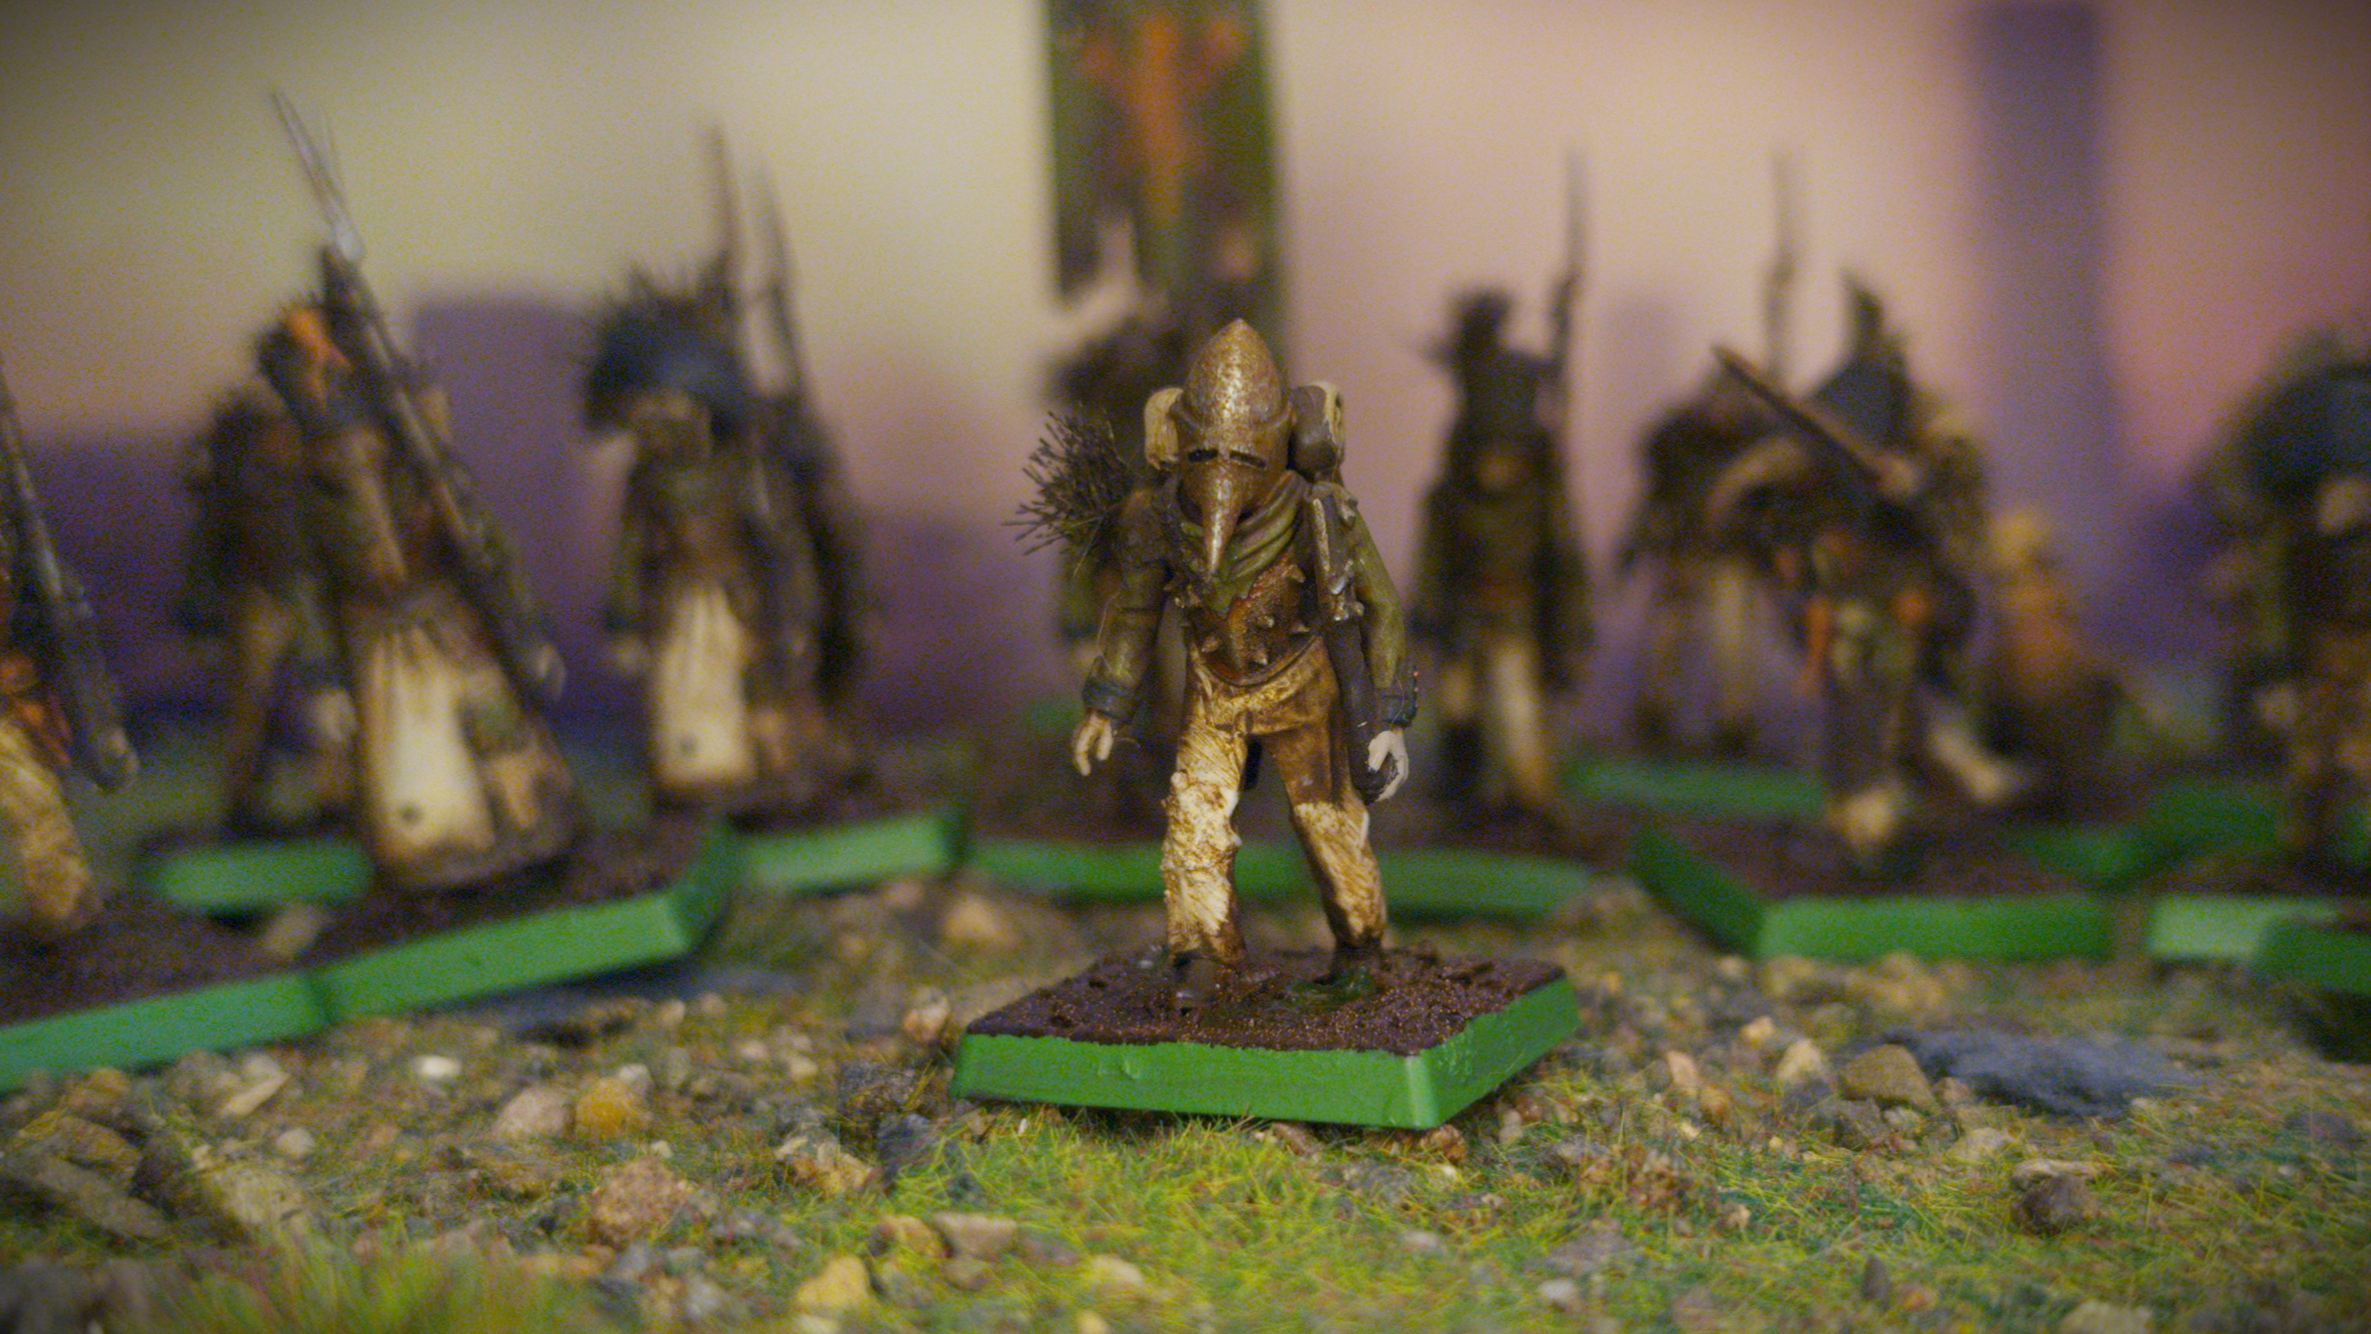
Once they arrived, I poked through the bits. The kit contains enough parts to make 12 infantry models with black powder weapons, plus a champion, musician, standard bearer and a rootling. Looking through the rules, I figured the best bet would be to turn them into a squad of Fodder. Champions, musicians and standard bearers don’t have any rules that I could find, so their inclusion would be purely aesthetic. In the end I decided to build everything, spare lads are not a bad thing, and the champion can stand in as a Snob for the time being. I gave him a sword to make him stand out a little more. Also, as squad sizes are fixed and they’re only used in a specific cult, the rootling isn’t much use to me by himself. Additionally, as this is probably the closest I’m going to get to historical wargaming, I decided to put them on square bases. 25mm for the infantry and 20mm for the rootling.
With the models assembled they needed some texturing before I could prime them. The convention for Turnip miniatures is to cover them in mud and tufts. For the latter, I cut some Gamers Grass Moss and Army Painter Swamp Tufts down to size and stuck them to the models with some superglue. I then used some Vallejo Dark Earth to both blend the tufts into the model and to add additional texture onto the shoulders and legs. Lastly, I painted some Typhus Corrosion over the metal details. Once everything was dry, I primed the models with Colour Forge Hyrax Brown. The models will have an overall brown feel, so a brown primer made sense.
Backdrop by Jon Hodgson Backdrops
Diving into the basecoats, I elected for mostly lighter colours so that I could then weather them down into drab and brown colours. I started by painting all the metal with Scale75 Thrash Metal. From there I painted the jackets with Vallejo Russian Uniform. I had originally intended to use Death Guard Green, but the coverage isn’t great, whereas Russian Uniform goes on in one layer. What would need more than one coat is the white trousers I had planned. To help make the jump from dark brown I first painted the trousers and bedrolls with Vallejo Khaki. The bedrolls would remain Khaki, but the trousers were then given a couple coats of Pro Acryl Ivory. Any exposed skin, which are mainly the hands, I painted with Two Thin Coats Griffon Claw. A couple of them have cloth wraps on their feet, and one guy appears to have a skeletal helmet, these details I painted with Army Painter Skeleton Bone. For a bit of contrast against the mostly light colours so far, I painted the hats and cuffs of the jackets with Two Thin Coats Death Reaper. The fur texture on the backpacks I painted with Steel Legion Drab. One of the last things I needed to do was to paint the bagpipe, it took me a while to decide but, in the end, I settled on giving it a couple coats of Two Thin Coats Dwarven Skin and picked out the patches with Vallejo Dwarf Skin. For the other flesh bag, the rootling, I instead used the airbrush to give them a top-down coat of Army Painter Air Nomad Flesh before giving them a bit of a highlight with some Daler-Rowney Flesh Tint ink. Horrible name for a decent ink.
The vegetables are where things get a little colourful. A lot of them have root vegetables hanging about their person, which is unsurprising given the setting. I picked out most of the carrot shaped vegetables with Jokaero Orange but also painted a few with Army Painter Skeleton Bone and Two Thin Coats Amethyst Rain, perhaps those are other cultivars or parsnips. I then painted the onions that a few have attached to their backpacks with Mournfang Brown before picking out any leaves and stems with Death Guard Green.
Backdrop by Jon Hodgson Backdrops
The last thing I needed to do was the banner. I started off by painting the pig with Two Thin Coats Dwarven Skin (to match the bagpipe) and their little tarp with Vallejo Khaki. The hoops on the barrel are painted with Scale75 Thrash Metal and the straps with Mournfang Brown. For the banner itself I first gave it a couple thin coats of Russian Uniform so that I had an even canvas. For the design itself I put on my big boy trousers and resigned myself to having to do some free hand. Given the number of tap root vegetables on the models a carrot themed design seemed the obvious choice. Plus, carrots sounded easy to paint. I used Jokaero Orange to paint in three very thin triangles, which I then rounded out at the tops. I mixed Jokaero Orange with a generous amount of Two Thin Cuirass Leather to make a shadow colour that I then painted in little bands around the carrots. For highlights I used Fire Slayer Orange and finished things off by rough handing in some leaves with Caliban Green.
Knowing the plan was to use enamel washes, I firstly went back and made sure to tidy up any basecoats with Cuirass Leather. Once that was done, I gave them all a coat of Gloss Varnish. To be honest, it wasn’t the gloss aspect that I needed, it was more that the only varnish I have in a rattle can is gloss. I could have used an airbrush, but a rattle can puts down a thicker and tougher layer. It was also at this point that one of my lads fell off my Priming Stick™ and snapped his musket. A good thing I have some spares then!
Billy Broken-Rifle. Backdrop by Jon Hodgson Backdrops
I gave the varnish a few days to properly cure, as I would be using some fairly harsh chemicals on the models. First things first I located my pots of enamel washes in the bottom of my hobby box and proceeded to shake the snot out of them. And then with no small amount of elbow grease managed to get them open. Seems it’s been a long time since I’ve used them. Sufficiently mixed I pipetted a small amount of Ammo Streaking Grime into a little bowl and then slathered it all over all the miniatures. I then left it until the wash was at least touch dry, which took thirty and forty-five minutes in these winter months. From that I put a very small amount of white spirits onto a make up sponge and lightly wiped it on the miniatures. This removed the wash from the raised areas but left the recesses dirty and gross. I made sure, particularly on the white trousers, not to wipe the models clean. I then did a similar process with Ammo Rust Streaks on the metallic details. As the rust wash is less potent than Streaking Grime, I didn’t feel the need to wipe it away and was happy with how it looked out of the bottle. I was about to leave things there but looking over the models, it seems that I had been a little overzealous in wiping away the Streaking Grime out of recesses and some of the softer details like patches on clothes and the joins between armour plates looked a little lacklustre. With that in mind I dropped some Ammo Dark Brown Wash for Green Vehicles around these details, exactly like I would for a pin wash, to help define them a little bit more. Once that was done and I was happy with the results I put them aside for a few days to let them completely dry.
Once the enamels had fully cured, I gave the models a coat of AK Interactive Ultra Matt varnish just to make sure everything was sealed down. With that done I could pick out the last few details. I carefully painted the buttons on the wrists and coat tails with a dot of Vallejo Hammered Copper and any stitches on the clothing with Two Thin Coats Dry Rust Brown. Lastly, I reinforced the rusted look of the metal by painting some Greenstuff World Liquid Pigments Light Rust into selected areas.
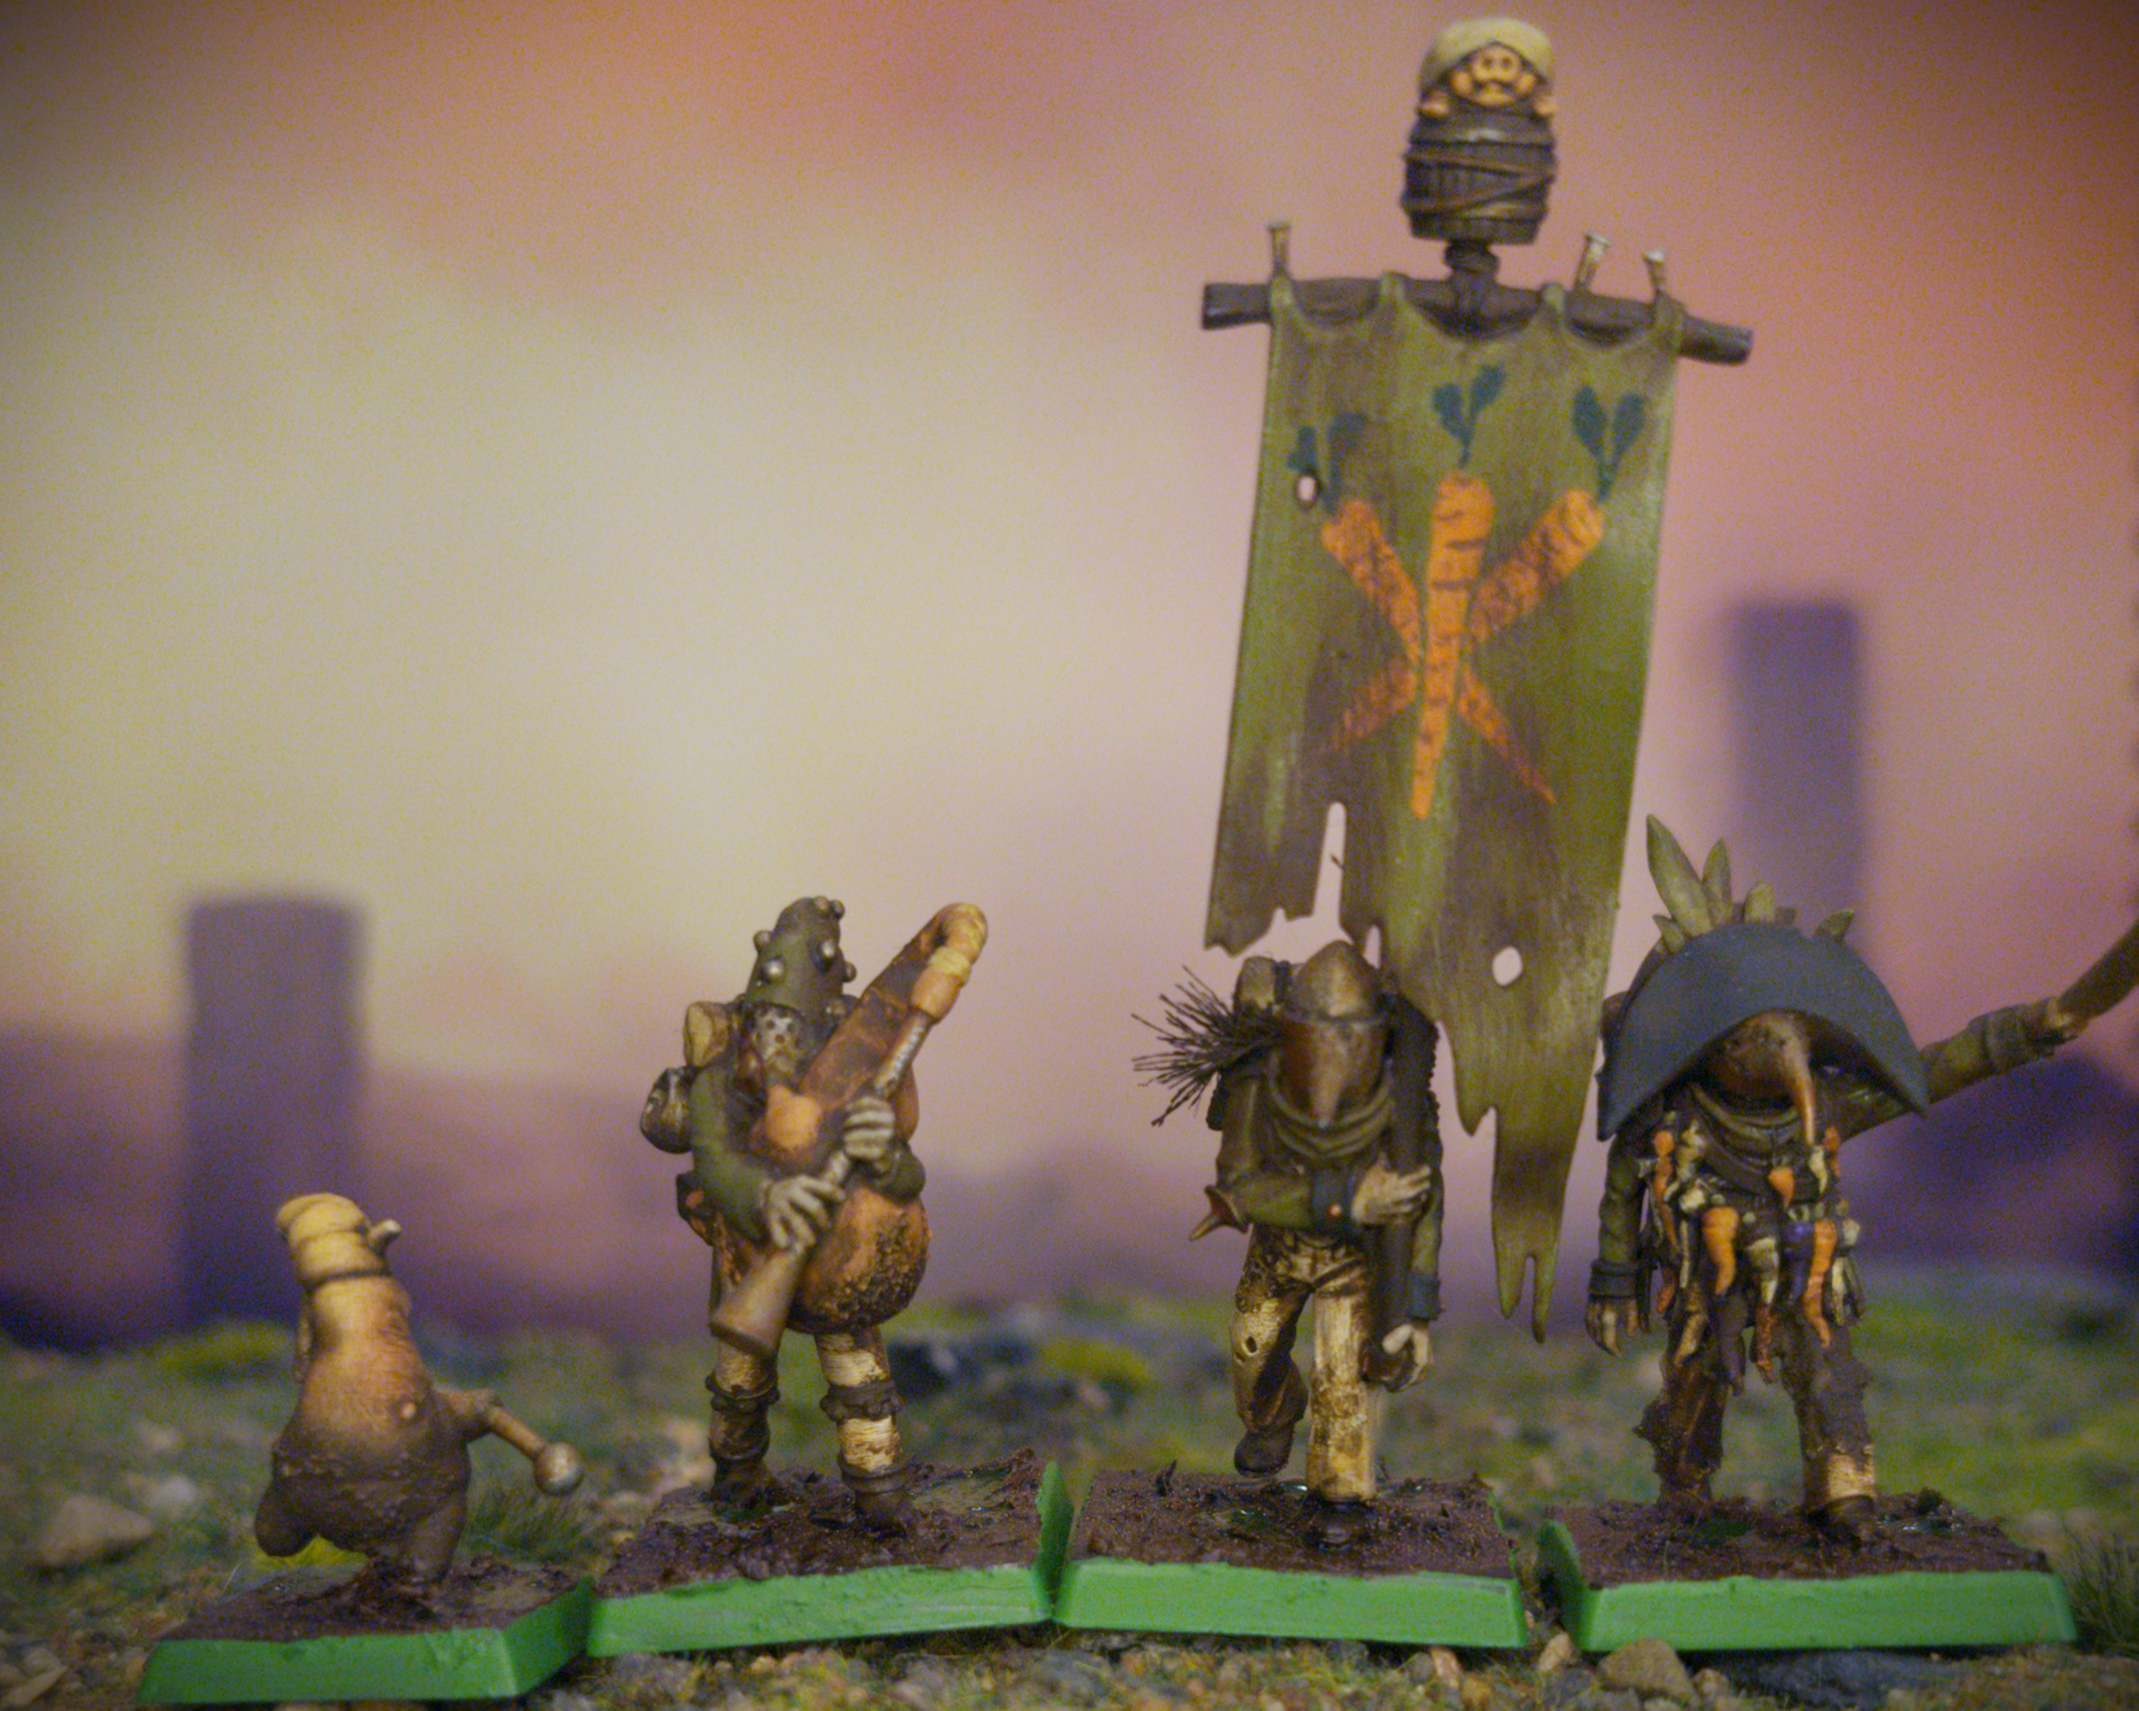
Command section. And Rootling. Backdrop by Jon Hodgson Backdrops
With the models done I moved onto the bases. I kept these pretty simple, slathering them with Vallejo Thick Brown mud before giving them a wash of Army Painter Strong Tone. In hindsight, what I should have done is put the texture paste on earlier so that I could use enamel washes. You live and learn I suppose. In any case, I then dabbed on some puddles of AK Interactive Swamp Water gel and painted the rims with a couple coats of Warboss Green. To be honest, I was finishing up some Nurgle miniatures and painting their base rims greens and kind of by muscle memory I picked up the Turnip28 guys and painted them green as well. If it draws too much attention away from the models too much, I can always repaint them.
Overall, I’m really happy with how my first steps into Turnip28 have turned out. They’re wonderfully bleak and downtrodden. Having built a bit of confidence, my next batch of Turnip models may actually involve some conversion work. And I think it may have to be some Brutes, or at least a dedicated Snob model.