Zombicide Invader - Civilian Extras Part VIII
At long last we come to the final miniatures in the Civilian Extras box. All that’s left are a few Abominations whose colour schemes were sufficiently different that I couldn’t get them done in my initial massive batch paint of the Invader Xenos. With the momentum I had gained from painting all those Survivors I marshalled myself for one last push. As opposed to the Survivors these remaining models were primed in a slightly lighter grey. And in hindsight, I did forget to give them a zenithal highlight with white ink.
I.R.I.S. Sentry Gun

This one is actually quite clever I think. Obviously the model is a reference to the turrets from the Portal series of games. But the name I.R.I.S. is a nice nod to the Aperture Science Inc. logo from the same games.
The paint scheme turned out to be really simple: the main body of the turret was painted with a couple thin coats of Ulthuan Grey and the innards and guns were painted with Scale75 Thrash Metal. The body was washed with Apothecary White contrast paint and the metallic areas with Basilicanum Grey. I then added a small dot of Evil Sunz Scarlet into the lenses.
Buddybot BDY-42

Very clearly Claptrap from the Borderlands series of games. Interesting that in Zombicide he's an enemy rather than a companion or even a playable character.
To start with I painted the housing (shell?) with a couple thin coats of Vallejo Heavy Goldbrown, the metallic areas I painted with Scale75 Thrash Metal and the wheel with Corvus Black. Once that was done the main body was given a wash with Army Painter Strong Tone and the metallic areas were given a coat of Basilicanum Grey.
Ordinarily that would be sufficient for me for a quick paint job. However the Borderlands universe is a battered and grimy one, and I could resist the opportunity to do a bit of quick weathering. So I sponged on a bit of Rhinox Hide around the edges to look like chipping and then heavily thinned down some Skrag Brown, which I applied to select areas to look like rust.
Widowmaker Abomination

I’m not sure that the Widowmaker is a reference to anything, either in looks or backstory.
I started the model by using the airbrush to apply some Vallejo Fire Red to the top of the crest of the head and to the tips of the legs and tail. Once that was done the skin was painted with Guilliman Flesh and the armoured plates with Speedpaint Desolate Brown. I finished things off by giving the armour a drybrush of Tyrant Skull.
Mother-in-law Abomination

Like the Widowmaker I’m not sure this is a reference to anything either.
Taking a cue from the experiments that I have done playing with yellow armour before I started by using the airbrush to apply Vallejo Squid Pink to the shadows of the armour. In hindsight, I was a little conservative with my application and I could have gone much harder with the Squid Pink. In any case, I then applied a layer of Iyanden Yellow to the armour, in areas that I had applied pink the yellow turned to a lovely warm orange. I finished things off by giving the flesh a coat of Guilliman Flesh and the tongue a coat of Speedpaint Familiar Pink.
Shadow Abomination
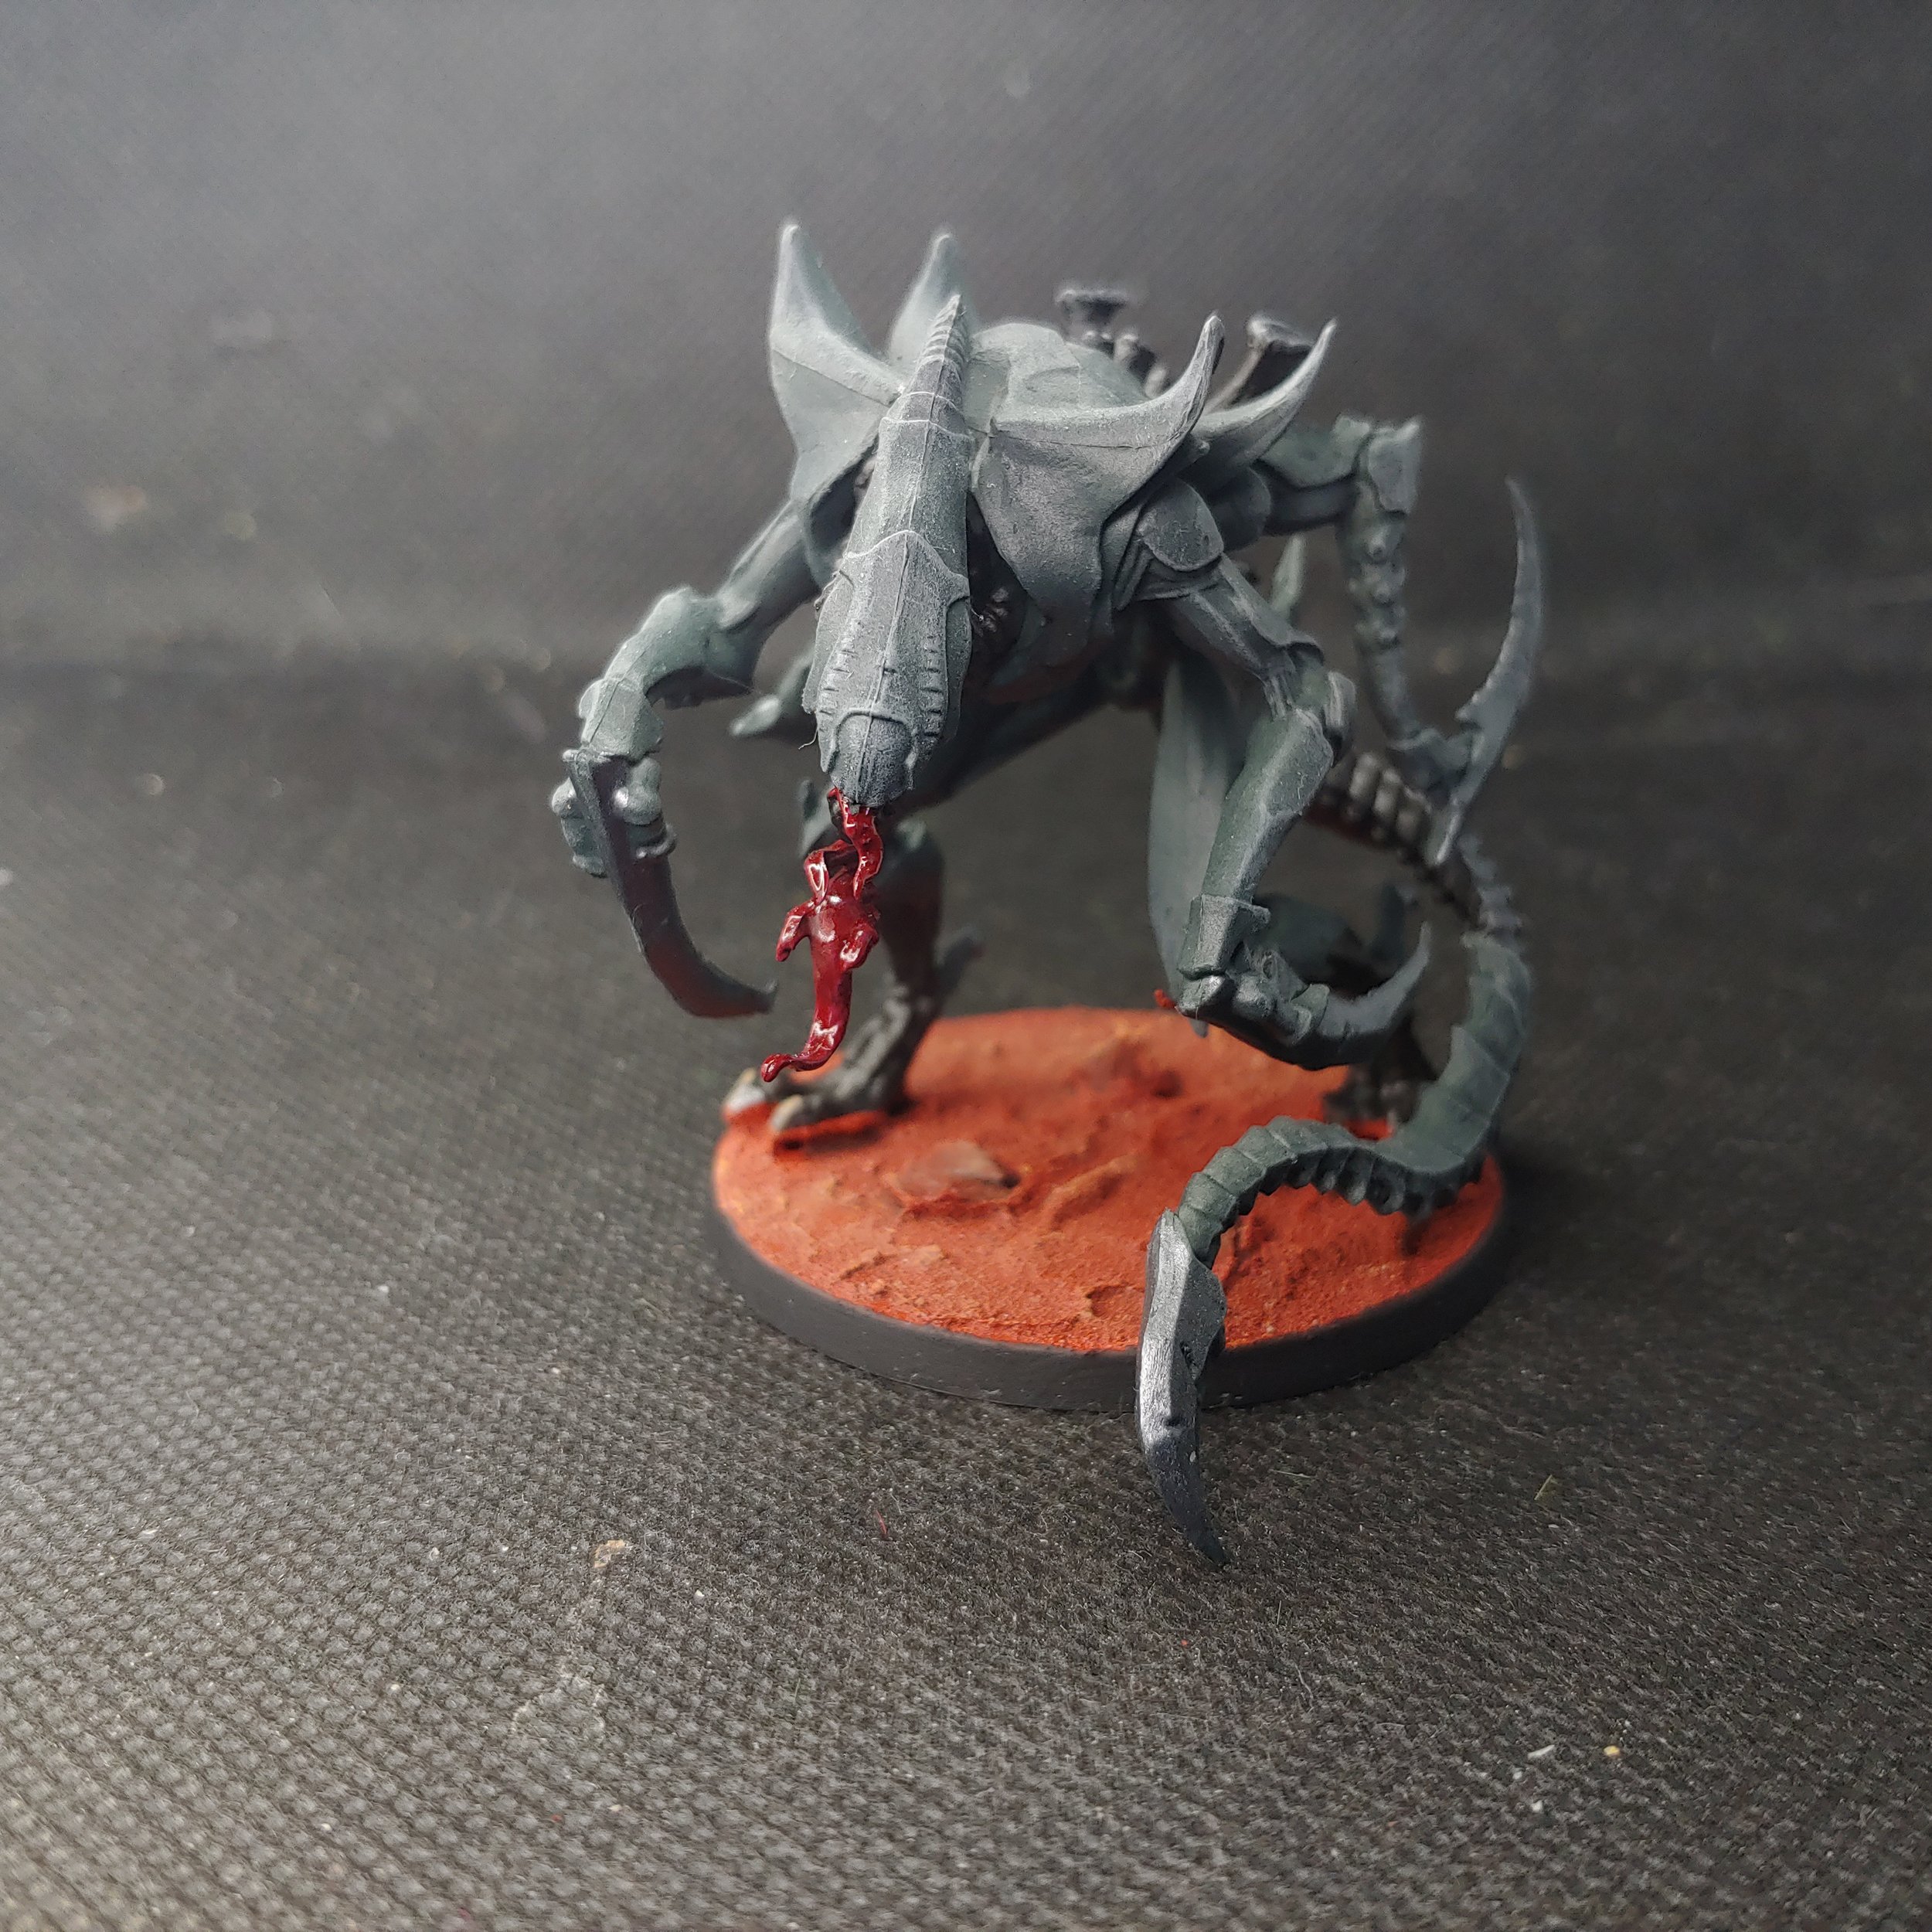
Now this one is very clearly the Xenomorph from the Alien series of films, although given its stature it might be more a Queen than a Drone.
I started by giving the model a nice even coat of Army Painter Raven Black through the airbrush. Once that was done I carefully painted the flesh with Cygor Brown. This wasn’t a massive colour shift but it was enough to differentiate skin from armoured plate. I also didn’t do everything single nook and cranny of the skin, this was the very last model I needed to do and I was keen to keep that speed painting mindset and get it done.
I finished off the details by painting the scything claws with Scale75 Black Metal and the tongue with Screamer Pink, the latter of which I gave a coat of Blood for the Blood God technical paint to make it look all gooey. Lastly, I gave the model a drybrush of Dawnstone to bring out the edges of the armoured plates.
Bases
Moving onto the bases, I covered the exposed areas with Vallejo Red Oxide texture paste and once that was dry I painted the rocks with Vallejo Fire Red. I then washed the bases with my homebrew Reikland Fleshshade as I had quite a few to do, the recipe for which is in my Zombicide Invader Xenos article. Once that was dry I then drybrushed the bases with Kindleflame making sure to get some on the boots of the models to simulate dust. Lastly I painted the rims of the bases with a matt black.
Done
Done? Done! All 82 models in the Civilians Extras box are now done! Admittedly I did the lion’s share about a year ago when I did the Xenos but it’s only been a couple of months since I sat down to blast my way through the remaining models. I’m really pleased with how they all turned out and it was a lot of fun changing up my painting style for an extended period. I almost miss doing layers and highlighting at this point. Big kudos to paints like Gore-Grunta Fur, Speedpaint Runic Grey and Basilicanum Grey that did a lot of heavy lifting throughout this process.
I think at this point, I pretty much have Dark Side and its associated Kickstarter extras left to do for Zombicide Invader. Not sure when I’ll get to them as I have a growing pile of Warhammer that really needs attending to…