Warhammer 40,000 - Shield-Captain
Backdrop by Jon Hodgson Backdrops
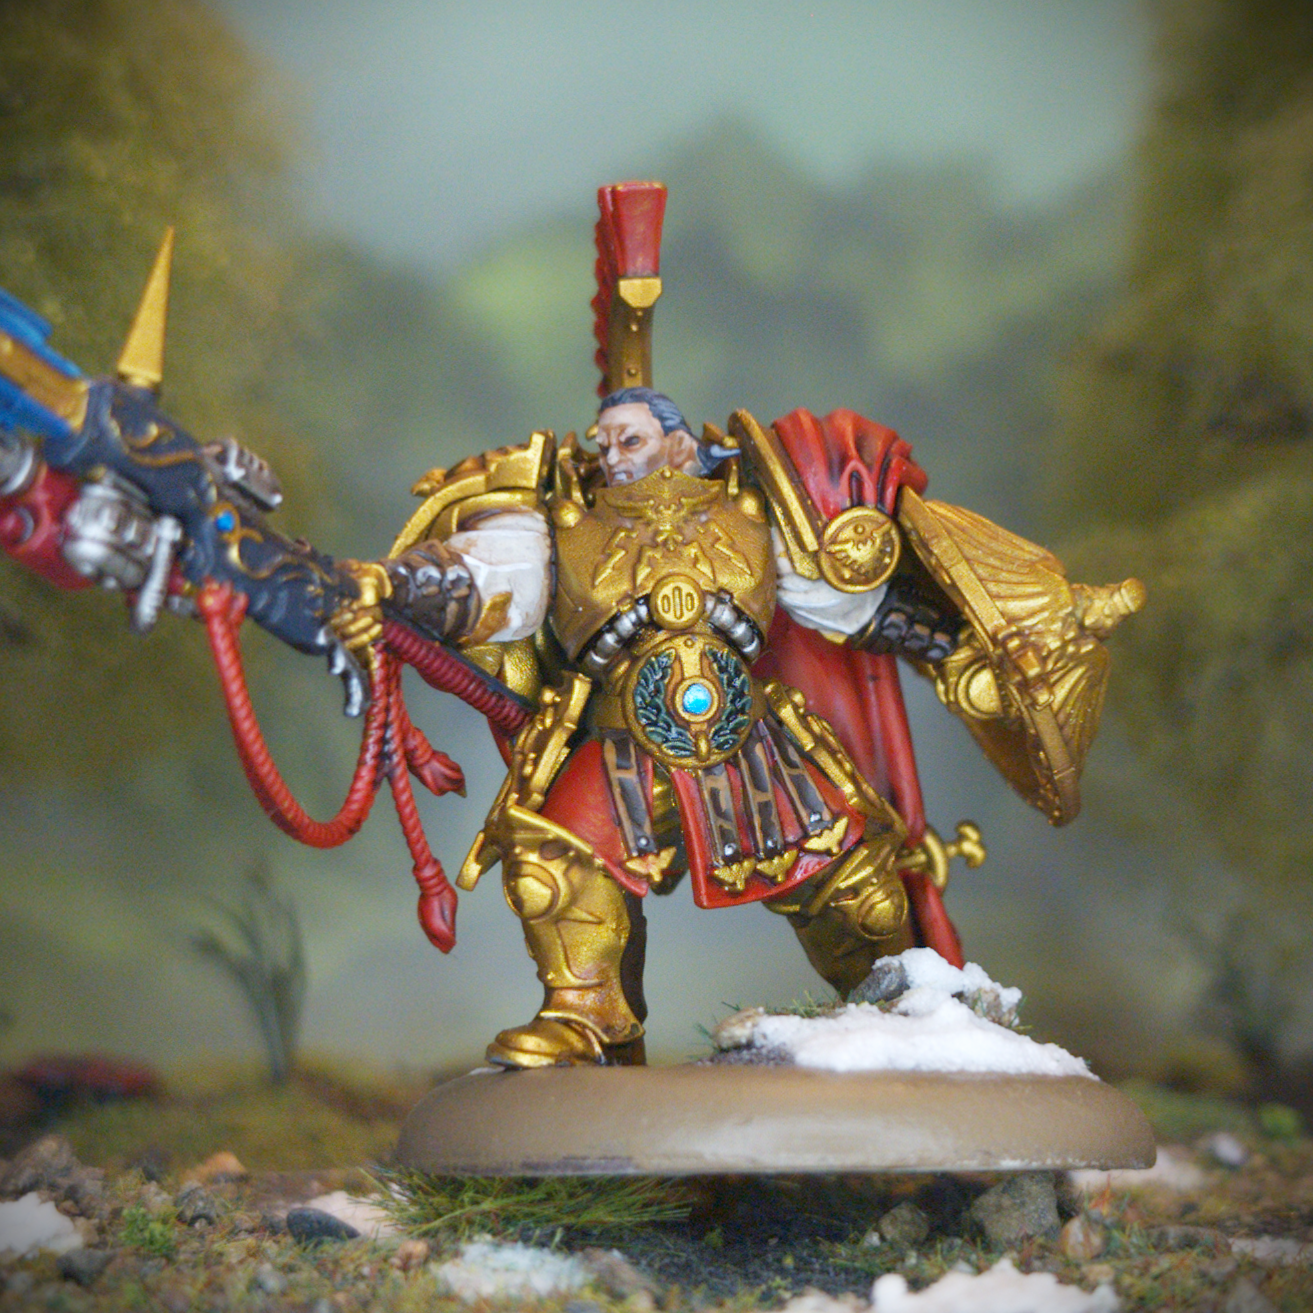
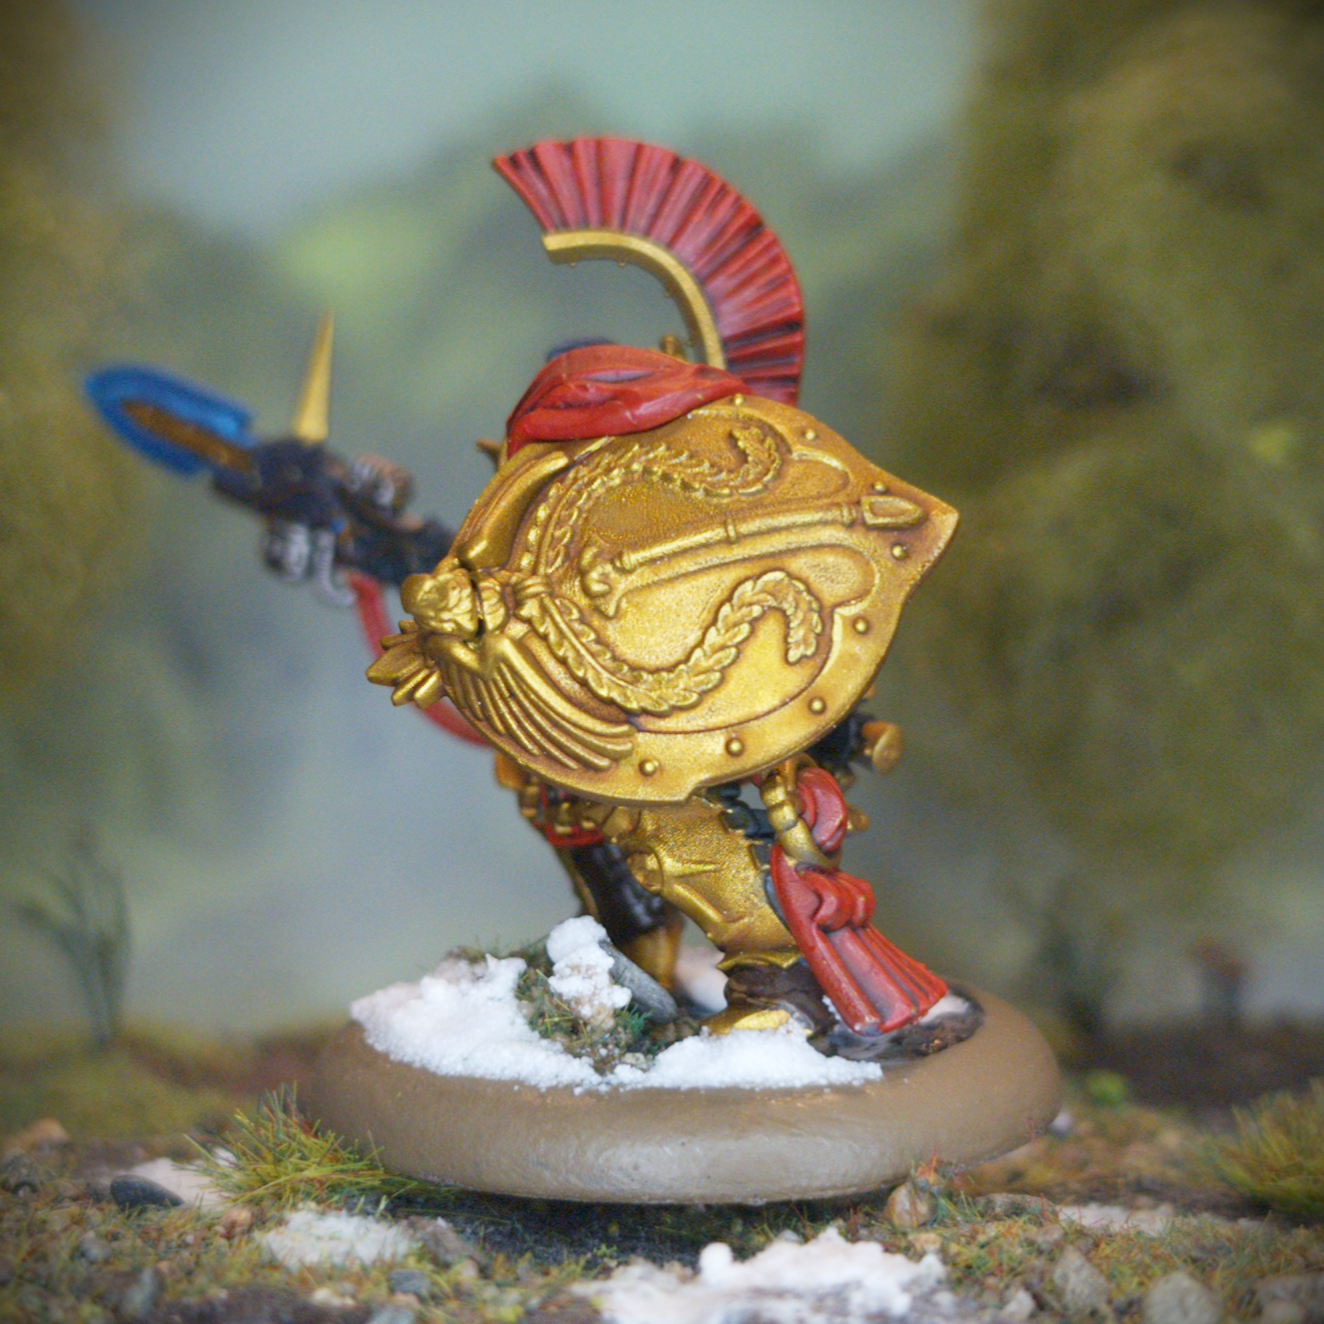
Hot on the heels of the Blade Champion I jumped right into the Shield-Captain. As with a lot of miniatures these days, the Shield-Captain has a tactical rock that he’s power posing on. And as I wanted to use one of my Tiny Worlds scenic bases the pillar had to go. Using my hobby knife I very carefully sliced the foot off the pillar and tidied up any excess plastic. At this point I also removed the small rock that was on his other foot. For ease of painting, I left both the head, which I had yet to choose, and shield separate. Both the main body and shield were then primed with Retributor Armour spray.
Backdrop by Jon Hodgson Backdrops
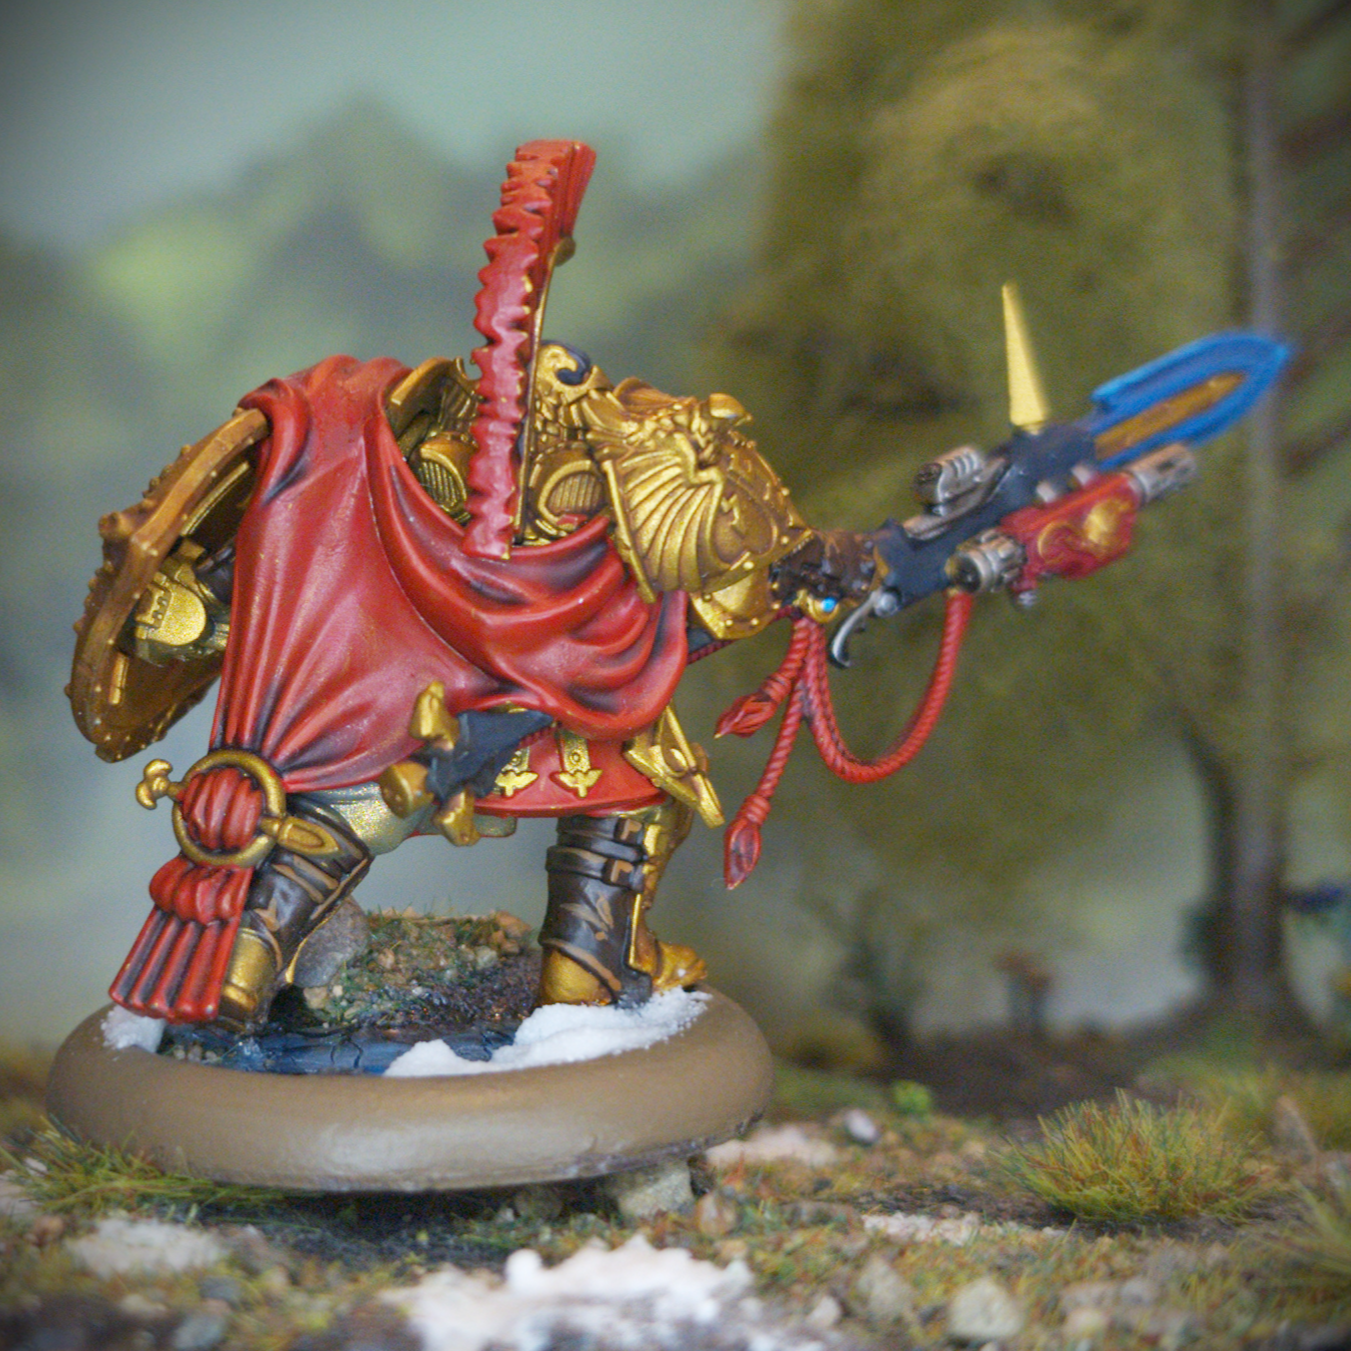
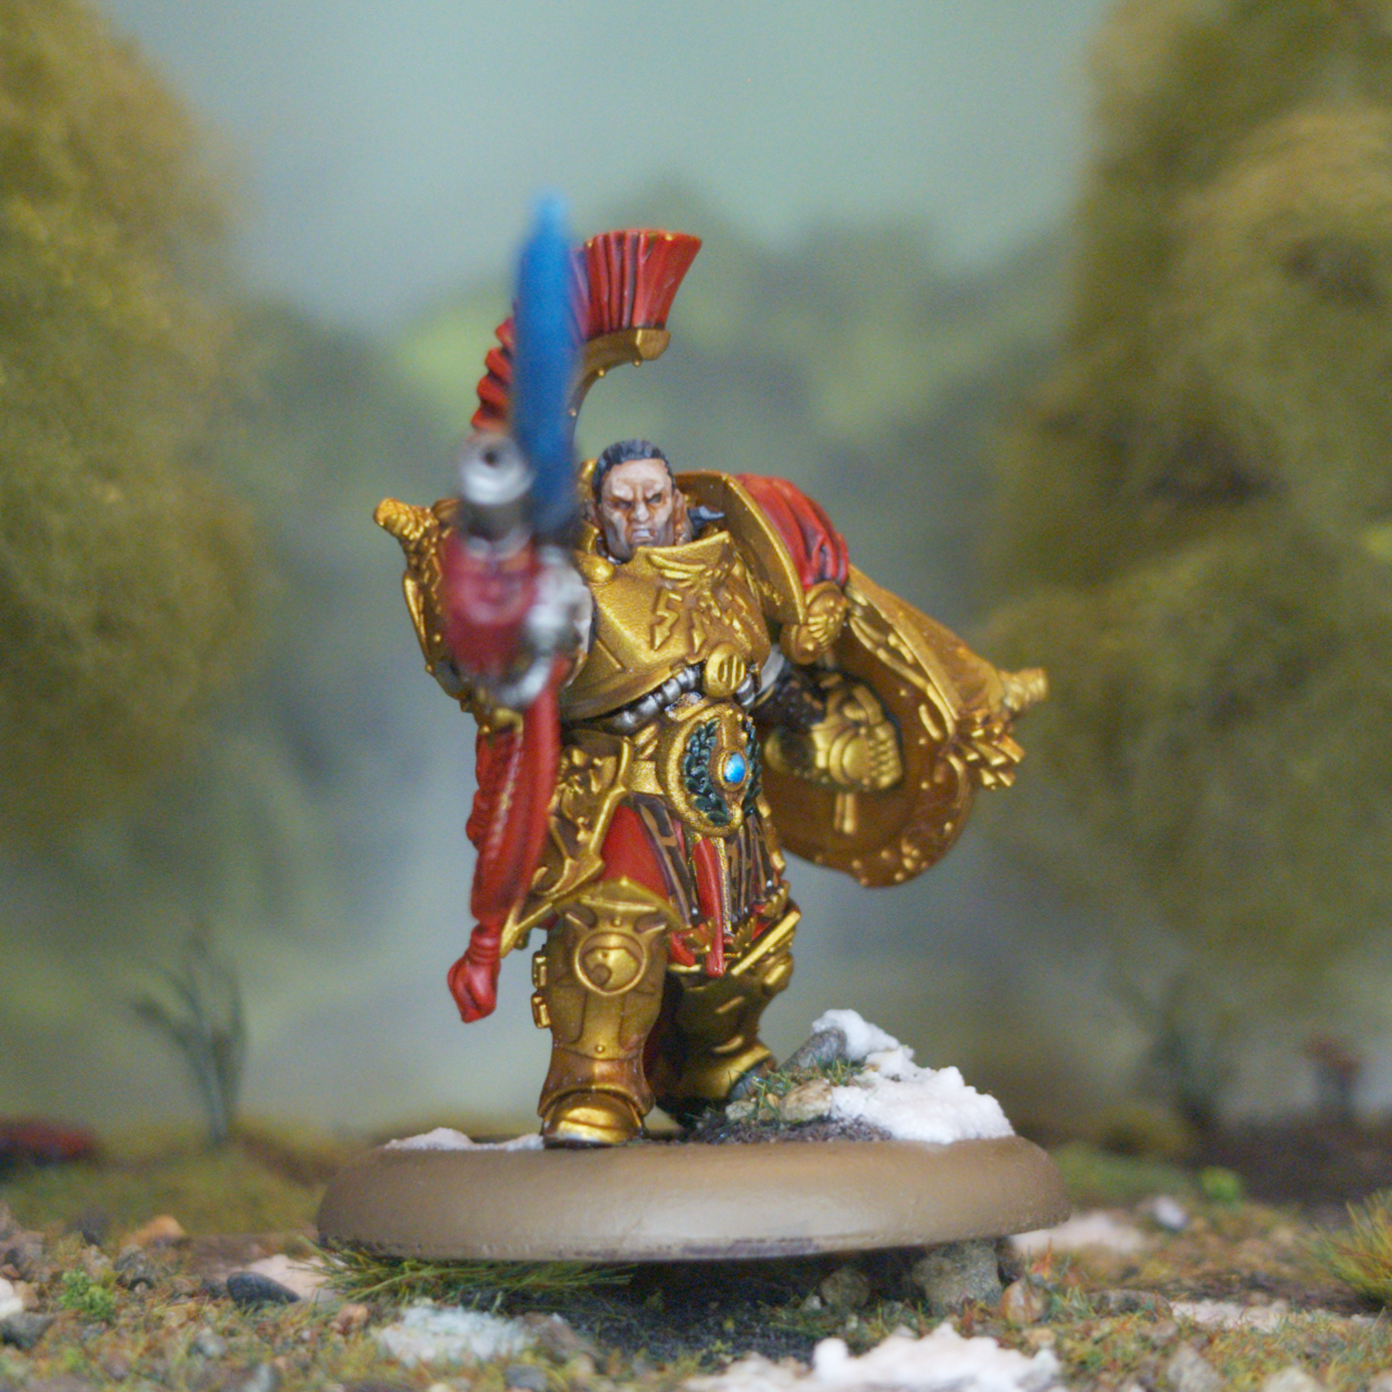
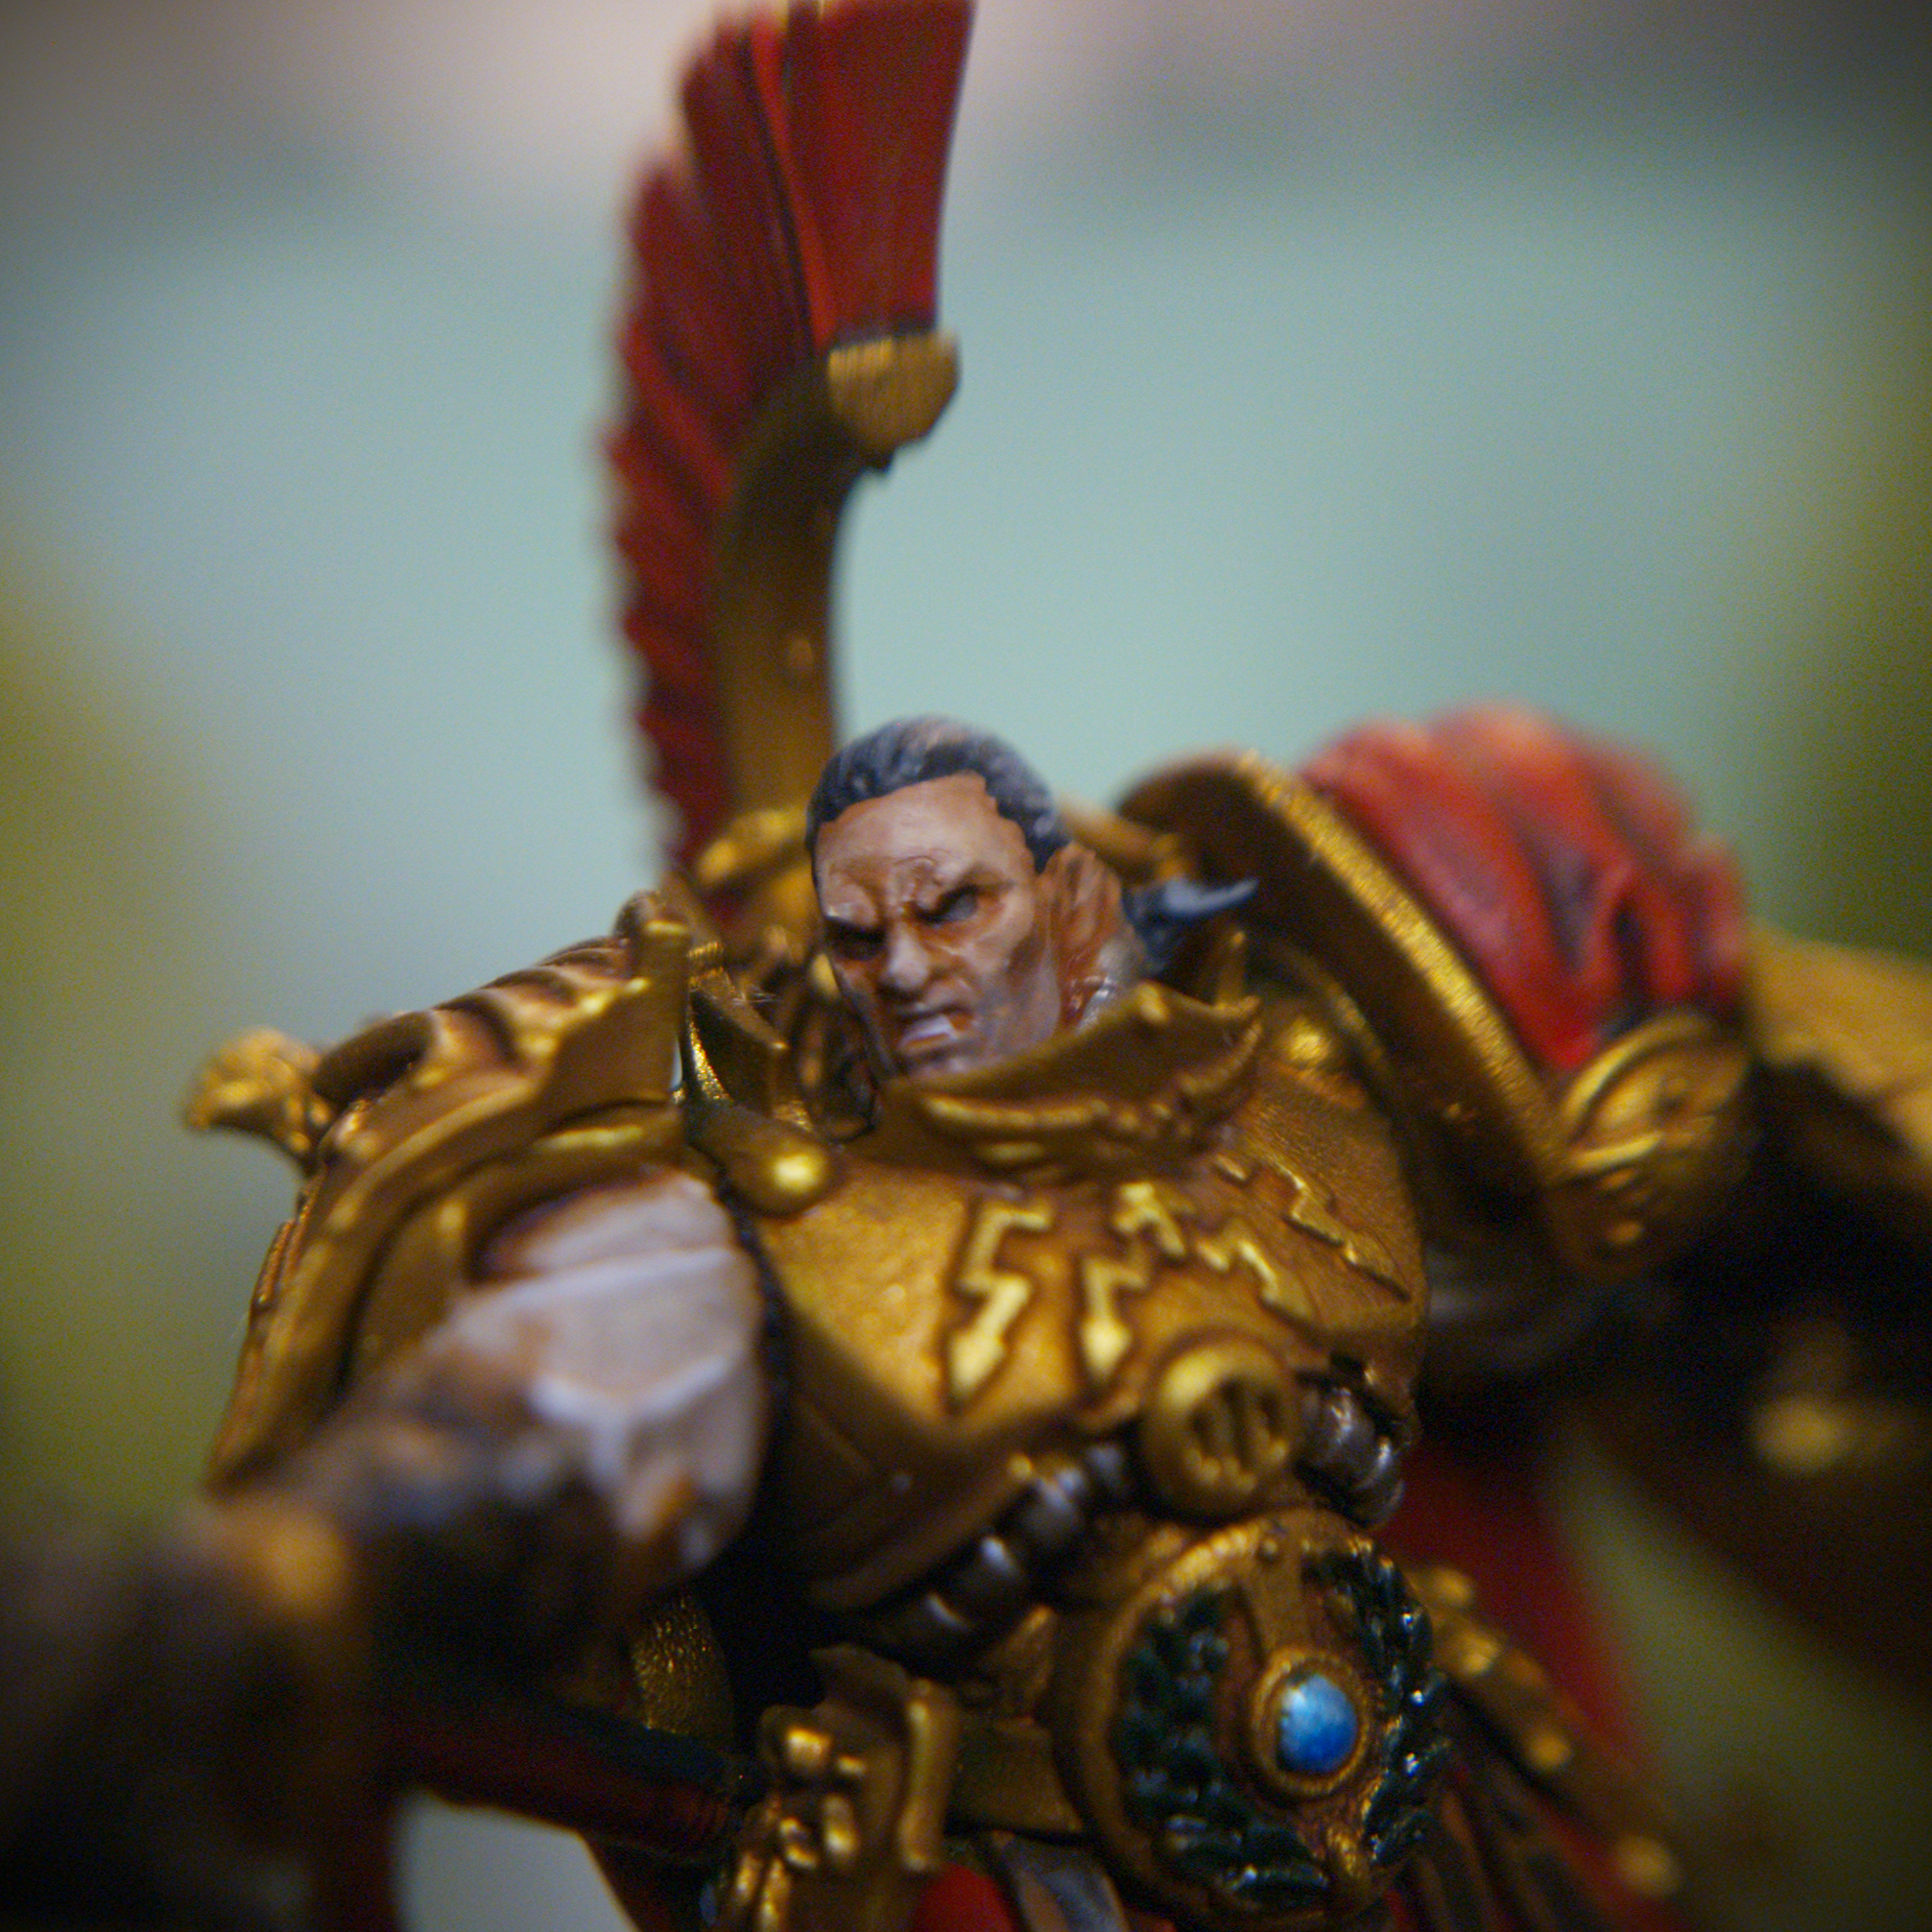
At least initially, the process for painting the Shield-Captain is pretty much the same as for the Blade Champion. I first tidied up any areas I missed with the spray with Scale75 Dwarven Gold. The cape was painted with a couple thin coats of Archive-X Caboose Red which the undersuit I painted with Pro Acryl Ivory. The leather details I painted with Two Thin Coats Cuirass Leather and the shaft of the Pyrithite Spear I painted with Two Thin Coats Death Reaper. The housing of meltagun and the grips on the spear I painted with Vallejo Scarlet Red. At this point I went back and tidied up the filigree design on the spear with Scale75 Dwarven Gold. I then painted the barrel and any tubing with Scale75 Thrash Metal. Lastly for the basecoats I picked out the laurel on his belt buckle with Caliban Green. I was tempted to paint the laurel on the shield green, but in the end I decided to keep the whole thing gold.
Backdrop by Jon Hodgson Backdrops
From there I could move into the washes, highlights and detailing, starting with giving the armour a coat of Reikland Fleshshade. The undersuit and cape meanwhile I washed with Sonic Sledgehammer’s Marine Juice wash. The silver and green details meanwhile I washed with Army Painter Dark Tone.
For the highlights I started by highlighting the edges and raised details on the armour with Scale75 Elven Gold. The red details like the cape and weapon housing I highlighted with Evil Sunz Scarlet and the undersuit with Army Painter Matt White. I picked out the edges of the laurel on the belt with Warpstone Glow. The silver areas I gave them some quick highlights with Scale75 Speed Metal.
For the blade on the spear, the process was the same as for the Blade Champion, although I did have to be a little more careful as some of it is hidden behind the melta barrel. I first basecoated the blade with a couple coats of Thousand Sons Blue to build up a solid colour before giving it a wash of Drakenhof Nightshade. I then layered the flat areas with another coat of Thousand Sons Blue before giving the edges a highlight of Temple Guard Blue.
“You there, what is your profession?” - Backdrop by Jon Hodgson Backdrops
Moving onto the face the keen-eyed amongst you might recognise that the head option I have chosen is not from the Shield-Captain kit but from the Blade Champion. I chose this one because, supposedly, the face is based on a certain Henry Cavill. And if anyone is going to lead by Custodes then it’s going to be Superman. To paint my Witcher I started by priming the head with Colour Forge Standard Grey and basecoating the skin with Two Thin Coats Dwarven Skin and the armour behind the head with Scale75 Dwarven Gold. I then gave these areas a wash of Reikland Fleshshade and layered the raised areas with Dwarven Skin. From there I mixed in progressively more and more Scale75 Light Skin and Pale Skin to the Dwarven Skin to build up my highlights. I then went back and deepened the shadows in some areas with Guilliman Flesh. I then heavily thinned some Two Thin Coats Dungeon Stone and glazed this across the chin to give the appearance of stubble. For the hair I was tempted to give him white hair like Geralt has but, in the end, settled on black. I started with a basecoat of Two Thin Coats Death Reaper before adding thin streaks of Dungeon Stone and further streaks of Two Thin Coats Carcharodon Grey to emphasise the strands of hair. Lastly for the head I painted the gorget and pipes with Scale75 Thrash Metal followed by a wash of Army Painter Dark Tone.
Backdrop by Jon Hodgson Backdrops
Finally, there was the base, once again I was using the round lipped bases that I got from Tiny Worlds. I started by priming it with Colour Forge Hyrax Brown before giving it a wash with Army Painter Strong Tone followed by a drybrush of Tyrant Skull. For the ice, I first painted in the recessed area with Army Painter Matt White before then giving it a coat of fairly heavily thinned Talassar Blue. I then used UV resin to build up the depth of the ice and once I was happy with it I cured it with a UV torch. At this point I attached the model to the base, using a brass rod in the underside of the foot to provide additional stability. I then covered the UV resin in a thick layer of clear crackle medium. Once it had fully dried I then gave it a wash of Drakenhof Nightshade followed by a drybrush of Army Painter Matt White to help make the cracks easier to see. For the final details, I dabbed some PVA glue onto the base and sprinkled on some Geek Gaming Scenics Base Ready Patchy Plains, which I then sealed down with some Geek Gaming Scenics Matt Sealant. I then mixed some Army Painter Battlefield Snow with some matt medium and dabbed this in patches onto the base and ice. Lastly, I painted the rim of the base with Steel Legion Drab.
