Miniac - The Witch
I’ve long been a fan of Miniac and when he launched a kickstarter several years ago to produce a trio of dark wood elf miniatures, I knew I had to get on board. Out of the three models on offer, the Witch, the Ranger and the Warrior, it was the Witch that spoke to me most. I placed my order, along with a display plinth and waited for the day I would paint my first 75mm scale miniature.
And so, this model has been a long time coming. But in many ways some of my previous models have simply been practice for this one. The fantasy elves I did recently were more to test out the suitability of the Vallejo Malefic Flesh paint set. And the Kingdom Death Monster Dungeon Armour pinup was simultaneously practice for skin and to put my chosen colours for the clothing through their paces. But with the practice and testing done, it was time to put on my big boy trousers and tackle Miniac’s The Witch miniature.
Assembly and Prep
Before putting things together, I first needed to give the parts a clean. Resin models often will be coated in a greasy release agent to help remove them from their casting moulds. A quick scrub with an old toothbrush in some warm soapy water is all that’s required, and soon enough I had the parts lying on some paper towels to dry. Once they were dry, I could start clipping them off the sprue and cleaning up any flash. I did however leave a small length of sprue attached to both the head and the feet.
I decided reasonably early on that the best way to paint this model would be subassemblies. The near beehive hair and high collar on the cape would make painting parts of the head quite difficult, so I left the head and cape separate from the main body. The arms and legs were attached to the body, but I left the body separate from the base, otherwise painting said base and even getting in and around the feet would be tricky. Lastly, the tree stumps were glued down in their respective places on the base.
Once I had everything glued together the next step was to fill the small gaps between the pieces. I can get away with half-arsing this on game pieces but for a larger scale display model I need to make an effort. So, I mixed up some greenstuff, rolled it into very thin tubes and painstakingly stuffed it into any gaps between the pieces. Gap filling is definitely an area I need to improve on so painstaking as it was, I was also glad for the practice. Every time I do gap filling with greenstuff, I’m surprised by how little of it you need. Once all the gaps had been filled, I left the model overnight for the greenstuff to cure.
I was very nearly ready to actually do some painting but first I needed to attach the various subassemblies, aside from the base, to a painting handle of some kind. For the main body and the head, I had cunningly left a small amount of sprue attached thus making attaching the subassembly to something handle shaped that much easier. For the head, I wrapped the sprue in some blu-tac that I stuck to the top of an old pill bottle. As the main is so much larger I needed something more hardwearing and with more weight. With that in mind I superglued the arm of the sprue to a spare Warhammer base and used a significant mass of greenstuff to both anchor the sprue down and to redistribute the weight lower and thus make it more stable. This worked for a little while, at least until the model snapped off its sprue. Annoying as this was, it was fortunate that it snapped at the sprue gate rather than the Witch herself. I still had the tab that slots into the base so the model could still be assembled. Thinking ahead I used my pin vice drill to drill down through the slot in the base. I then dry fit the Witch into the slot on the base and drilled up through the hole I had made into the foot of the Witch. With that done I removed the Witch from the base and glued a long brass rod into the hole I had drilled in the foot. This brass rod I could then spear through a block of cork on the top of my painting handle. For the cape I took a similar approach, drilling a small hole where the cape attaches to the body and inserting a brass rod. As I drilled right through the cape to wear the head would attach, I used a small blob of greenstuff to stop the cape from moving. The brass rod could then be skewered into a cork that I could use as a handle for painting.
At long last I was ready to prime the miniature. Despite being larger, or perhaps because of it, the model does have a lot of intricate detail on it. And whilst I could use a rattle can to prime the miniature there is the slight risk of it clogging up details or drying with a grainy texture if it’s too humid. To avoid such things, I instead decided to use an airbrush primer. By using the airbrush, it meant that I could gradually put down thin layers, building them up until the whole model was primed and ready for painting. I decided to use Vallejo Black Surface Primer as I have had good results with it previously and black is a good starting point for the colours I was going to use. I worked carefully around each component, giving them a thorough coat and left it to cure for twenty-four hours.
The Witch
As Games Workshop’s methodology of basecoat-wash-highlight is still ingrained in me I tend to basecoat with a mid-tone and then shade down for my shadows and build up for the highlights. I know a lot of people will, for example, paint in only the shadow areas, then only mid-tones and then the highlights before blending it all together. But frankly, my blending skills are weak sauce, so I like to have that safety net of a basecoat.
Skin

The most logical place to start on the miniature, in my opinion, was the skin. From my tests with the Vallejo Malefic Flesh paint set I knew that I wanted to give the Witch a purple skin tone. To that effect I base coated all the skin with the titular Vallejo Malefic Skin. From there I started with the shadows, mixing Vallejo Purple Shadows in with the Malefic Skin and painting this into the recesses of the skin. I mixed in more Purple Shadows for the deeper recesses and finally glazed pure Purple Shadows over the areas I had painted to tie them altogether.
Moving onto the highlights, I mixed some Vallejo Pale Flesh into the Malefic Flesh for my first layer. However this turned out rather chalky and I didn’t like how it looked. So I repainted these areas with Malefic Flesh and started again, however this time I mixed the Malefic Flesh with Scale75 Light Skin. As I did for the shadows, slowly increasing the amount of Purple Shadows in the mix, I did the same for the highlights, increasing the amount of Light Skin for each successive layer. For the next set of highlights, I mixed Malefic Flesh with Scale75 Pale Skin and used this to build on the highlights I had already put down. I pushed the highlights further by mixing Malefic Flesh with Vallejo White Flesh and applying this to the highest areas. I finished with point highlights, such as on the tips of the ears, and on the scars on the arm using pure White Flesh. To finish things off I carefully painted over the scars with Greenstuff World Fluor Violet to give them an ethereal and magical look.

Wood Growths

Technically the skin wasn’t yet done as the Witch has a few wood growths protruding from her flesh, not to mention the arm that has completely transformed into twystwood. That’s right Miniac, I read the lore prompts.
To paint these areas, I started with a basecoat of Two Thin Coats Scorched Earth and while it was still wet, I blended in some Vallejo Forest Skin. This wasn’t too important on the growths on the thighs but on the arm and head, it was essential in creating a transition between the darker wood up at the shoulder to the lighter wood at the wrist. For the shadows, rather than do something like a darker brown I decided to use Vallejo Deep Forest Skin as it is the complimentary shadow colour to Forest Skin. Also, being a fairly transparent colour it didn’t change the brightness of Scorched Earth areas of the model either. To highlight these areas, I mixed Forest Skin with Scale75 Light Skin and painted it on the tips of the wood growths.
Hair

With the skin being predominantly purple in tone and knowing the clothing would be green I didn’t want to push the boat out too far with the hair. I had learned with the fantasy elves that having too many opposing colours on a miniature does not look good. With that in mind, I decided on a dark yet poppy green colour for the hair.
I started with a basecoat of Incubi Darkness and mixed in more and more Warp Lightning to successive stages of highlights. The final set of highlights were done with pure Warp Lightning. At this point I also used Warp Lightning for the eyebrows.
Eyes

Selfie!
The last thing I needed to do before moving onto the clothing was the eyes. I started by painting the sclera (the white part) with Ulthuan Grey. I find that an off-white works better than a pure white as given the number of blood vessels in the eye, sclera won’t be a pure white anyway. To give it that slight red tint I then gave the eyes a coat of Army Painter Red Tone wash. As a bonus Red Tone has a slightly glossy finish that is perfect for imitating the wet look of the eyes. Like the hair I wanted to keep with the green theme, so I painted the irises with Caliban Green. Whilst this is quite a dark green it does stand out nicely against both the white of the eye and surrounding purple skin. To finish things off I carefully painted the pupil with a dot of Army Painter Matt Black and then used a smaller dot of Army Painter Matt White to give the eye a specular highlight.
It was at this point that I realised that I should have waited until I had assembled the model to paint the irises and pupils, as it stands the model is staring straight ahead rather than looking at the forest sprite in her hand. Oh well, we live and learn.
Leaves
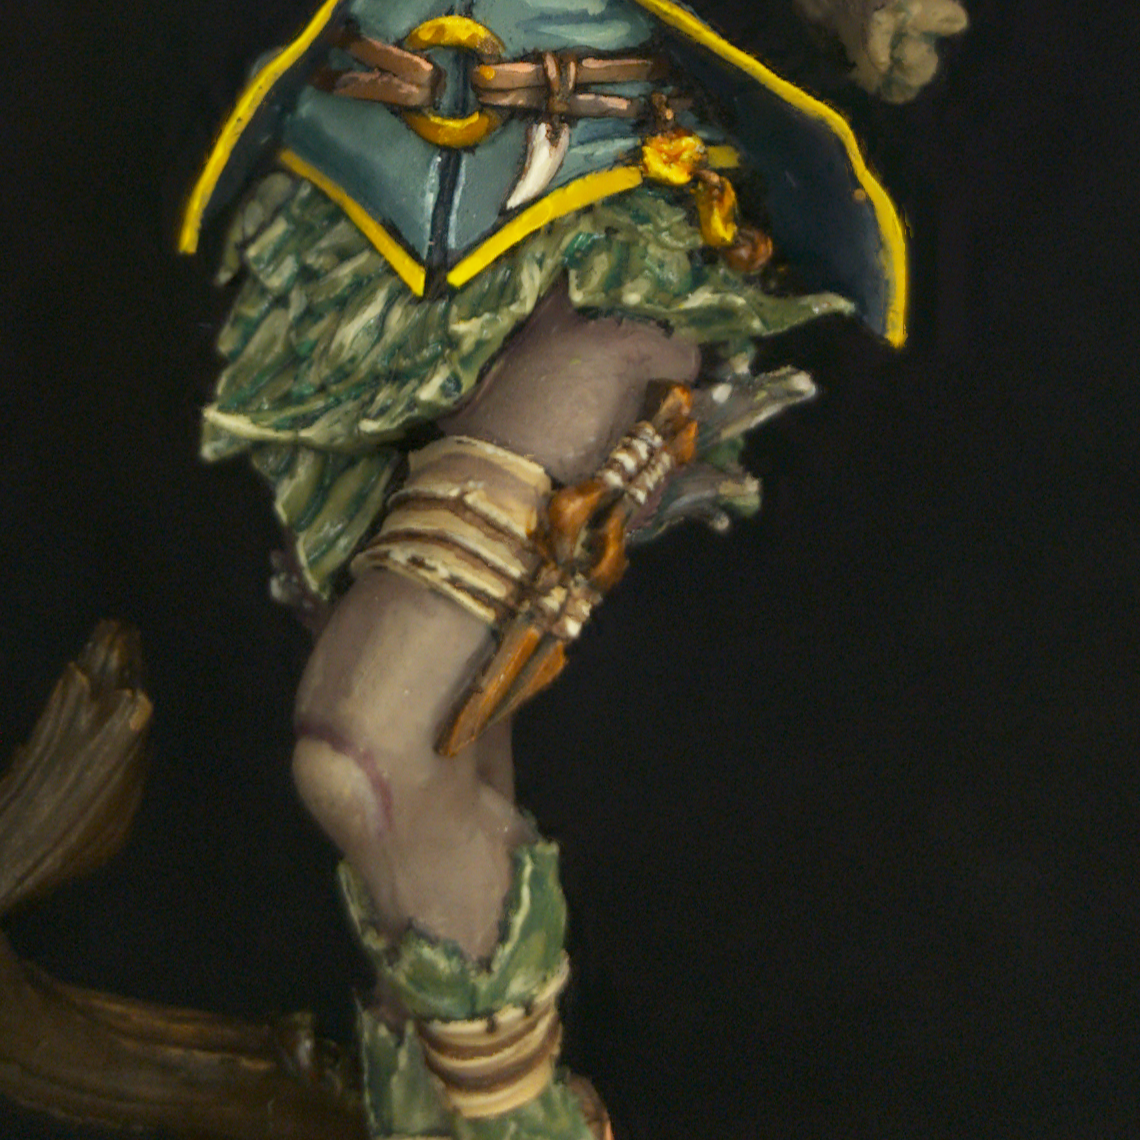
Medsection showing details of the leaves, wraps and leather.
With the anatomical features done I could make a start on the various parts of clothing. I decided to start with the leaves around the waist and ankles. Having used it before for vegetation, I started by giving the leaves a couple of coats of Death Guard Green. As these areas are highly textured, I decided to give them a wash rather than painstakingly paint in all the shadows by hand. I thinned down some Vallejo Deep Forest Skin with some Lahmian Medium and applied this over the leaves. I then went back and layered the raised areas with Death Guard Green. Whilst this did restore some of the brightness of the leaves, I wanted to push things a little further, so I mixed Death Guard Green with some Ionrach Skin, in a roughly fifty-fifty ratio, and used this for the second layer. I then highlighted the edges of the leaves with pure Ionrach Skin.
Wraps
For the wraps on the ankles, thigh, and on the right wrist, I wanted to give them a dirty cloth appearance. To do this I started by base coating them with Vallejo Khaki. I then heavily thinned Two Thin Coats Cuirass Leather with water and ran it into the recessed areas between the strips of cloth. I then highlighted the edges of the strips of cloth with Vallejo Pale Sand.
Leather
Next up were the leather details. These were mainly the shoes but there’s also the straps around the waist. To get things started I base coated these areas with Two Thin Coats Cuirass Leather. For the highlights I mix in Vallejo Khaki for the subsequent layers. Unfortunately, this ended up looking a bit too much like the cloth wraps I did earlier. To differentiate things, I mixed some Mournfang Brown into my existing Khaki and Cuirass Leather blend and then applied this to the model in very thin, almost transparent, layers. This shifted the leather from a pale brown to a ruddier brown, which helped to separate it from the cloth wraps. I further reinforced this with an edge highlight of Army Painter Buffed Hide.
Clothing

At long last it was time to make a start on all the clothing. Naturally I wanted to keep to the same overall forest theme, so the plan was to paint the clothes with the same desaturated greens that I had used for the Dungeon Armour pinup’s clothing and on one of the fantasy elves.
With that in mind I base coated the clothing with Army Painter Evergreen Fog. From there I mixed in successively more Incubi Darkness for the shadow areas. Admittedly, I did struggle a little here as the clothing is quite smooth as I guess at the larger scale the folds in clothing don’t need to be quite so exaggerated. For the deepest shadows, such as the seam down the front of the clothing I painted in pure Incubi Darkness.
For the highlights I needed a slightly different approach. Incubi Darkness is fairly transparent, so it was easier to blend the shadow layers together. However, the highlight colours, Army Painter Patagon Pine and Mossy Green, are straight up opaque. In order to get some decent transitions I found the best method was wet blending. So what I’d do is go over these areas with Evergreen Fog and then while the paint is still wet, blending in my mix of Evergreen Fog and Patagon Pine. I then let that completely dry as I’d been caught out on my White Speaker pinup overworking the paint on the skin, giving it a grainy texture. I could then repeat the process for the next layer, painting on some Evergreen Fog and Patagon Pine mix and then blending in some pure Patagon Pine. And for the next layer, and the next until my final layer was pure Mossy Green. I finished things off by mixing Mossy Green with some AK Interactive Pastel Green and using this for fine highlights, mainly along the edges of details.
For the trim I decided on a vibrant yellow to compliment the cooler greens. For I started by carefully painting the trim with Vallejo Heavy Goldbrown, followed by layering the raised areas with Yriel Yellow. I finished it off by painting the highest areas and the edges with Flash Gitz Yellow.
Cape

I briefly considered painting the cape in purple to contrast the rest of the clothing, but the purple colours I have are quite vibrant, so I didn’t want to draw attention away from the clothing.
I decided in the end to paint the cape in the same scheme I had the clothing, using the same range of greens plus Incubi Darkness. This wasn’t without complications, however. The clothing could be broken down into reasonably sized areas that I could work on one at a time, but the cape is essentially one big area. Too big to wet blend everything at once, as unfortunately there is an upper limit to how quickly I can paint. Nevertheless, I work in sections as best I could, painting shadows in the recesses and highlights on the folds. Unlike the clothing, I instead used plain Army Painter Mossy Green to edge highlight the cape.
Forest Sprite

Like the cape I had initially planned to do something quite vibrant for the Forest Sprite, but again I decided that I didn’t want to draw too much attention away from the Witch herself. Besides, I was running out of green colours by this point.
I was tempted to use Vallejo Forest Skin as a base colour but honestly, I didn’t like how it turned out on the fantasy elf test model. Instead, I base coated the skin with Two Thin Coats Dwarven Skin. As they’re a spirit of the woods I gave them Death Guard Green hair and leaves. I then carefully picked out the teeth with Army Painter Skeleton Bone and the tongue with Two Thin Coats Sword Hilt Burgundy. To tie these elements together I gave the sprite a coat of Army Painter Military Green wash.
Once the wash was dry, I could then make a start on the layers and highlights. I start by layering the skin back up with Two Thin Coats Dwarven Skin. I then created a quick intermediate mix of Dwarven Skin and Scale75 Pale Skin, which I then used for the second layer. After which I used pure Pale Skin as a highlight on the raised areas. For the leaves and hair, I mixed Death Guard Green with some AK Interactive Pastel Green and use this for the highlights. I hoped that using Pastel Green instead of Ionrach Skin, as I had for the leaves on the Witch, would subtly differentiate them.
To finish things off, for now anyway, I picked out the eyes with a dot of Pastel Green. And then used Warp Lightning to give them a glowing effect.
Wood stake

I decided that instead of a magic bolt impaling the Forest Sprite, that it was a wooden stake, or perhaps a branch or similar. I believe that the concept art by Tatiana Vetrova seems to indicate something similar, as does the 32mm model painted by Elizabeth Beckly-Bradford. It’s the 75mm model painted by Benjamin Kantor that interprets it as a magical effect.
I started by base coating the stake with Army Painter Oak Brown. I then built up the layers by mixing in more and more Vallejo Khaki until I was using nearly pure Khaki. To tie everything together I then gave the wood a coat of Wyldwood contrast paint.
As the wood is skewered right through our unlucky forest sprite we needed some blood effects. For this I simply covered the sharp end and part of the sprite’s chest with Blood for the Blood God technical paint. For extra funsies, I added a dribble of blood to the corner of the mouth.
Gold

All that was left were the metallic details like the jewellery and tools. As the clothing trim was already yellow, I figured that a yellow-burn non-metallic metal gold would fit in with the rest of the model for the jewellery around her neck and the charms on her waist.
As always, I used Squidmar’s NMM gold recipe, so I started by mixing Vallejo Scrofulous Brown and Mournfang Brown. I’m not sure the exact ratio as too much Scrofulous Brown makes the mix a little too transparent for base coating. One of these days I’m going to find a single pot solution. Anyway, once I had the mix correct, I then used it to basecoat all the areas that will be gold. I then mixed in progressively more Army Painter Matt White to build up the layers and highlights, for the final highlights I used pure Matt White along the edges. To give the jewellery a golden hue I then glazed Iyanden Yellow over these areas.
Copper

The last thing I needed to do on the Witch were the metal bit that weren’t gold, like the links between the charms on her waist and what I think are two daggers on her thigh. I toyed with the idea of doing the blue-steel non-metallic metal that I’ve been playing with recently but ultimately, I decided that the blue would clash too much with the greens and purples on the model. The browns and reds of copper would blend in nicely with the rest of the model but, I didn’t want to do true metallic and I had no idea how to paint non-metallic copper.
I decided to be brave and learn how to do the latter, hoping that I had the right paints on hand. I watched a few videos on YouTube but the one that stuck out to me was one by Vince Venturella, I had used some of his tutorials before and I always found them useful. I didn’t quite have the paints he was using but I could make a rough approximation.
To get things started I base coated the copper areas with Two Thin Coats Cuirass Leather. I then mixed a small amount of Vallejo Scarlet Red into Mournfang Brown to give it more of a red tone and used that for the next layer. For the next layer I used Scale75 Pale Skin, which sounds like an odd choice but skin tones are often red-brown so they match quite nicely with copper tones. The next step, Vince says, is to mix up a pale green-grey colour which I did by combining one part Two Thin Coats Dungeon Stone, one part Vallejo Russian Uniform and four parts Army Painter Matt White. I then mixed this into the first mix of Mournfang Brown and Scarlet Red to build up the next layers of highlights. The green-grey mix was then used for the final and sharpest highlights. The next step was to thin down the Vallejo Scarlet Red and use it to glaze over the brown areas to give them more of a reddish tint. Likewise, I used thinned Sotek Green in the shadows as a sort of verdigris tint.
The result was a little flat, the colours a bit too muted. To me it didn’t quite read as copper. But let me be clear, this is not a criticism of Vince’s tutorial or his copper paint scheme. It is more than likely my poor execution. Nevertheless, to punch things up a bit I glazed some Gore Grunta Fur over the copper areas, similar to what I did with Iyanden Yellow for the gold. The result was a punchy orange-red on the brighter areas that to my eye read more like copper.
Base
With the Witch complete, it was time to make a start on the base. Whilst I had primed it black, I did give it a quick spray with Halfords Camouflage Brown directly from above. I figured the brown undercoat would help with the earthy tones I would use to paint the base.
Stone

Tempted as I was to give the stone areas a basecoat grey and a brown wash, and call it a day, I knew I needed to do something a little more involved. Especially for a model at this scale. With that in mind, I got out an old ratty brush and used that to roughly stipple on Two Thin Coats Dungeon Stone, making sure to leave plenty of the underlying brown and black showing through. I then did a second layer, this time mixing some Vallejo Wolf Grey in with the Dungeon Stone and stippling over a smaller area. As rocks aren’t just grey, I then mixed a small amount of Two Thin Coats Amethyst Rayne into some Vallejo Khaki and stippled this on in patches. I then did one final stipple layer of Wolf Grey. I then blended all the layers together with a coat of Army Painter Speedpaint Gravelord Grey followed by a coat of Army Painter Military Wash to give it a green tint.
Wood

For the wood on the base, I took a different approach than I had for the wood stuck through the poor sprite. I started by giving it a very rough basecoat of Army Painter Oak Brown, the paint is quite thin so it should through some of the brown and black undercoat. I then mixed Oak Brown with Two Thin Coats Dungeon Stone; trees are surprisingly grey after all and used this to layer over the bark. For subsequent layers I mixed in more and more Vallejo Pale Sand, until I was using basically pure Pale Sand. To tie everything together, I mixed Wyldwood with some airbrush thinner as according to Pete the Wargamer it works better than thinning contrast paints with water. I couldn’t conclusively confirm this, but it does thin nicely enough to show the underlying layers when I applied it over the wood details.
Moss, Dirt & Mushrooms
At this point I was on the home stretch, and I was keen to get this project completed. So with that in mind I carefully base coated the moss with Vallejo Russian Uniform, the caps of the mushrooms with a couple thin coats of Balor Brown, their stems with Two Thin Coats Death Reaper and the dirt around the base with Two Thin Coats Scorched Earth.
The dirt, mushrooms and the underside of the stone then got a wash of Army Painter Strong Tone. The moss meanwhile was washed with Army Painter Military Wash.
With the washes done I then did a bit of layering on the mushroom caps with Balor Brown to brighten them back up again. I then mixed some Vallejo Pale Sand with the Balor Brown and stippled on some highlights, similar to how I did for the stone. This brightened them a little too much however so to knock things back down I gave the caps a coat of Snakebite Leather, a dirty yellow-brown colour. The result was a little blotchy but honestly, I wasn’t against it, it made it look a bit more real.
I faced similar issues on the moss as I did on the fungi. I layered the moss with Vallejo Russian Uniform and then highlighted it with a mix of Russian Uniform and AK Interactive Pastel Green. Which, as I said, ended up looking a bit pale. I gave it a coat of Army Painter Speedpaint Desolate Brown, which is more of a drab green and that seemed to do the trick.
I left the dirt as is as I didn’t want to mess with too much. I briefly contemplated using some aggregates like Geek Gaming Scenics base ready range, but I figured it would be out of scale and look out of place.
With everything painted, all I now needed to do was to superglue each of the subassemblies together and then use some epoxy to attach the base to its plinth.
Final Thoughts
And I’m done! My first 75mm scale model! I’m really pleased with how this has turned out. I’m really happy with my colour choices and although there isn’t a huge amount of visual storytelling in my paint scheme, it does feel very coherent. None of the elements, to me anyway, feel out of place.
Obviously, there’s a few bits that could use some improvement. For example, I’m still bad at placing the highlights for non-metallic metal so things don’t quite read as metal. And my blends could be better, some of the transitions between shades do still look a bit stark.
It sounds a bit corny, but I do feel like I’ve taken the next step in my painting journey. Sure, I’ve painted plenty of models that are purely for the display cabinet, but the bigger scale makes this feel like a proper display piece. The wooden plinth probably also helps with that to be honest.
In any case, it’s another model done from the Pile of Potential. Although it does have me looking at what other larger scale models I can paint next. Miniac does have two other forest elves after all…