Dungeons and Dragons - Tiefling Artificer
My wife and I have been keen for a few years to play some Dungeons and Dragons, we were in a game some years ago but unfortunately that fizzled out. While at the UK Games Expo last year she did one of those gumball machine things that give you a random race and class, ideally as a prompt to find a group or otherwise make an effort to do some roleplay. As you might imagine from the title of this article, she drew a Tiefling Artificer.
As a further prompt I decided to get her a mini from HeroForge, that I could then paint for her. I spent a bit of time going through the options on HeroForge, I’d not used the service before so I was intrigued to see what was available. And I have to say they certainly aren’t lacking for parts, be it fantasy, contemporary or sci-fi they will probably have what you’re looking for. I picked out the options that I thought would best represent a Tiefling, giving them cloven feet and horns for example. As they’re the Artificer I decided that instead of weapons I would give them workshop tools like the wrench and hammer. Likewise for the clothing I opted for more civilian items like the apron rather than combat gear like armour. Happy with all my choices, I picked a decent looking pose and pressed Order. Once the model arrived I gave it a once over, the print quality was pretty good and it had been suitably cleaned up of support struts. I primed the model with Colour Forge Standard Grey and set up the wet palette ready to get stuck into the painting.
Skin
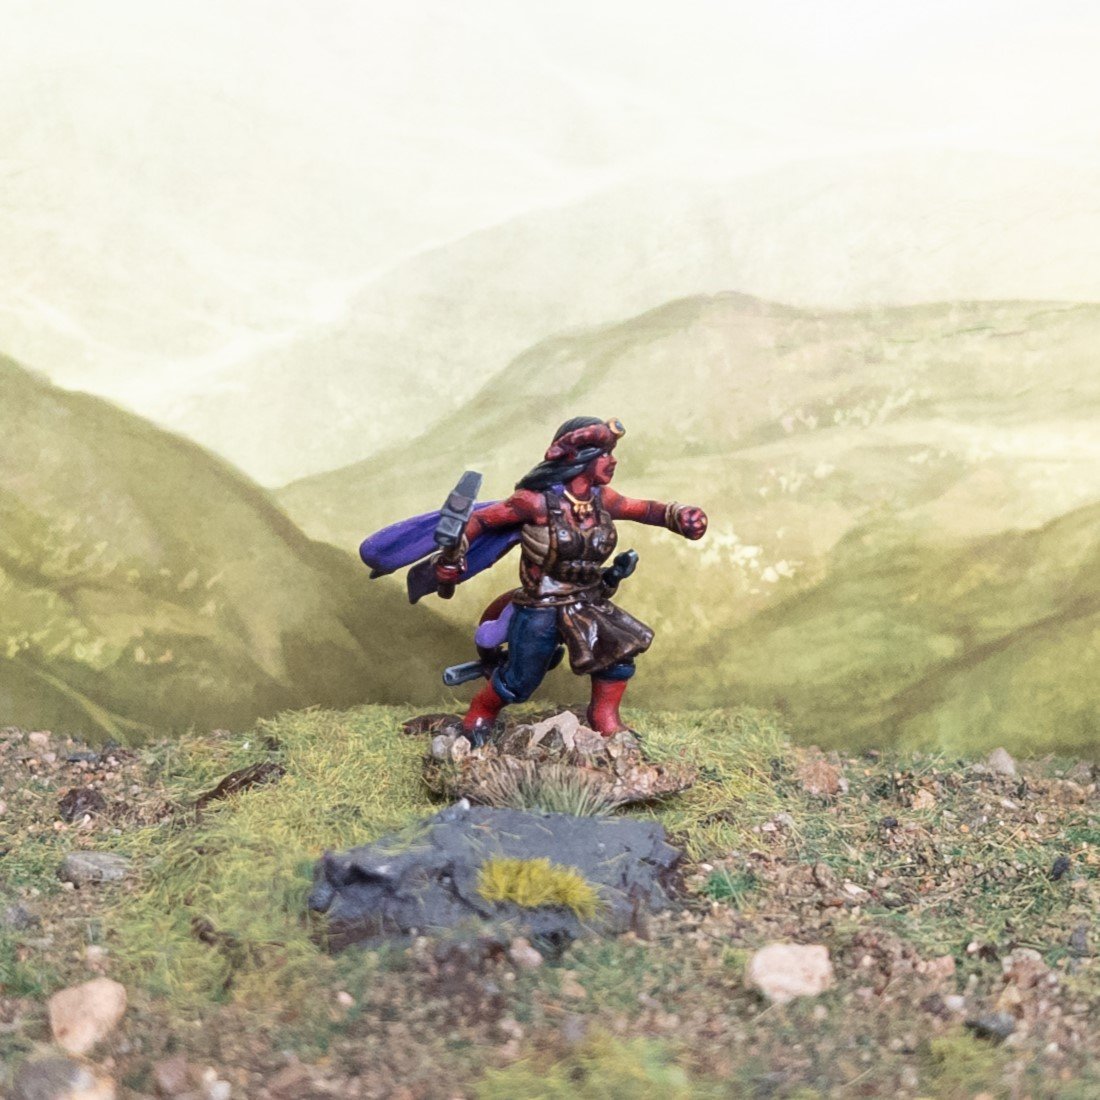
Backdrop by Jon Hodgson Backdrops
As usual I started with the skin. The red skin of demonkin certainly presented a challenge or two but I felt like I was up for it. As I was going to put a bit more effort into this than my usual rank and file cultist I decided the best way to proceed was to basecoat the shadow colour then build up from there. So with that in mind I gave the skin a couple layers of Two Thin Coats Royal Cloak. The next step was to start building up the red of the skin. To that end I mixed Archive-X Caboose Red with the Royal Cloak in a roughly fifty-fifty mix. I then layered this on all but the very deepest recesses. I then used pure Caboose Red smaller layer to really bring out that red tone of the skin.
I wanted to push things a little further with some highlights. But Caboose Red is already a fairly bright colour, so as it's the skin I’m painting I mixed it with some Two Thin Coats Dwarven Skin and layered this on the highest areas of the skin. Unfortunately, this turned out to be a bit too pasty and pink for the skin tone I was looking for. Unperturbed, I heavily thinned down some Caboose Red so that it was fairly translucent. Then I wiped most of the paint off my brush onto a piece of tissue which allowed me to glaze a thin layer of Caboose Red over the skin bringing it back to a nice saturated red colour.
While I was doing the skin I decided to get the eyes done and out of the way. I started by carefully painting in the eyes with Pallid Wych Flesh, as the name suggests it’s a very pale, almost white, skin tone. Next I painted the irises with Two Thin Coats Celestial Blue to match the colour of my wifes’ eyes. Used Liquitex Carbon Black acrylic ink I painted in a dot for each pupil. Lastly, I tied everything together with a thin wash of Army Painter Red Tone.
Basecoats
WIth the skin done I moved onto the remaining basecoats. I started by painting the wraps on the hands and under the apron with Vallejo Khaki. The apron and any leather straps I painted with Rhinox Hide. Being careful around the face and ears, I painted the hair and her tools with Two Thin Coats Death Reaper. I also used this as the basecoat for the eventual non-metal metallic on the tools. The base and the hammer handle I painted with Two Thin Coats Scorched Earth. As purple is my wife’s favourite colour I painted the scarf with Two Thin Coats Sorcerer’s Cloak. The trousers I painted with a few thin coats of Vallejo Night Blue. Lastly for the basecoats I painted the goggles and any jewellery with Scale75 Dwarven Gold.
Washes and Highlights

Backdrop by Jon Hodgson Backdrops
With the basecoats done it was time to move onto the washes and highlights. I kept the washes fairly simple, giving the cloth wraps and leather areas a coat of Army Painter Strong Tone. The hair meanwhile I washed with a coat of Army Painter Dark Tone, and while I had it out I ran a thin line of Dark Tone into the stitching and recesses of the trousers.
Moving onto the highlights, for the cloth wraps I mixed Vallejo Pale Sand into the original basecoat of Vallejo Khaki and painted thin lines along the edges. I only did this on the wraps on the hands and as I felt doing it on the ones around the chest would draw too much attention to the sides of the model, rather than the front. Speaking of the front, I highlighted the leather apron by painting small scratches of Skrag Brown around the edges to make it look well worn. It is, or was, a work apron after all. For the trousers and goggles I layered and highlighted them with Kantor Blue. Lastly for the highlights I used Two Thin Coats Dungeon Stone on the raised areas of the hair.
For the scarf, as it’s quite a large area I decided to do the lights and shadows with wet blending rather than using a wash. I had basecoated it with the mid-tone the Two Thin Coats medium purple colours, Sorcerer’s Cloak. For the shadows I painted Two Thin Coats Amethyst Rayne then while it was still wet on the model used Sorcerer’s Cloak to blend the transition. I repeated this process with Two Thin Coats Runic Purple for the highlights. This was a little tricky as Runic Purple is quite a chalky colour, so it took a few passes to get a smooth colour.
Lastly, I attempted to do non-metallic metal on the tools. Starting with Two Thin Coats Dungeon and working up through Dawnstone and Two Thin Coats Cacharadon Grey I added successively smaller highlights, trying to get smooth transitions between each layer. I say attempted because I’m not overly thrilled with how it turned out. I think my issue with steel non-metallic metal is that I need to introduce more colours, going from near black to near white just doesn’t sell it. Case in point, the blue steel I did a few years ago turned out looking pretty good. I’ll have to look up some tutorials and find some other miniatures to practice on.
Base

Backdrop by Jon Hodgson Backdrops
The base and display plinth represented a fair amount of challenge. I had spent quite a lot of time searching for a suitable display box. It’s surprisingly hard to find something small enough and within budget. For those of you shouting “cobalt keep” at your screen, they don’t ship to the UK. As far as I know. And if they did, the shipping would disqualify them for budgetary reasons. I eventually settled on some generic display cases from Amazon, they were a little taller than I would have liked and I had to buy eight of them, but they were better than nothing. At least I’d have spares.
The first step was to build up some height, so that my ~3cm model didn’t look too dinky in the 10cm high case. As a foundation I cut out some plywood in the rough shape of the base of the display case, I then stacked three layers of cork tile on top, using my hobby clippers and fingers to tear away at the sides to make things look seamless. This brought me around 2cm of height so now the model should be fairly central in the case rather than being near the bottom.
Next I needed a way to attach the model to the case, albeit not permanently. The answer, as always, is to harness the power of magnets. When I stick a magnet to a model’s base for storage, I’ll typically only use one and that’s usually enough to keep it stuck to the magnetic sheeting. But for this model I wanted to make extra sure that it wasn’t going to go anywhere while it was in its case. So I dug small recesses in the cork for four small disc magnets. It was then a case of painstakingly attaching magnets to the base of the model in the correct polarity. I managed to get three stuck down before giving up. But! The model didn’t go anywhere when I test fit it to the base.
Construction done, it was time to move onto painting. I primed the small hill I had made with Colour Forge Matt Black and used Army Painter Matt Black to get in anywhere the spray had missed. To further help the sides blend together and look a bit more natural I covered them in Stirland Mud texture paint. The top of the plinth and the base of the model I then painted with Two Thin Coats Scorched Earth. Being sure to leave a space for the model to go, I then covered the plinth and base with PVA glue and sprinkled on Geek Gaming Scenics Base Ready Patchy Plains. I then sealed this down with some Geek Gaming Scenics Matt Sealant Spray. I finished things off by sticking down a couple of tufts and then gluing the plinth into the base of the case. Then it was just a case of popping the model in her place, putting the lid on and waiting for my wife’s birthday to roll around.
Final thoughts

Backdrop by Jon Hodgson Backdrops
One of the horns broke off! :(
I have no idea how, or when. I’m fairly sure it was intact when I gifted it to my wife. And we’ve hoovered since then, so it’s long gone I’d say.
But, she loved it. We even found some time to play a TTRPG together, although we didn’t need any models. At least we now have a physical reminder to find a DnD group.